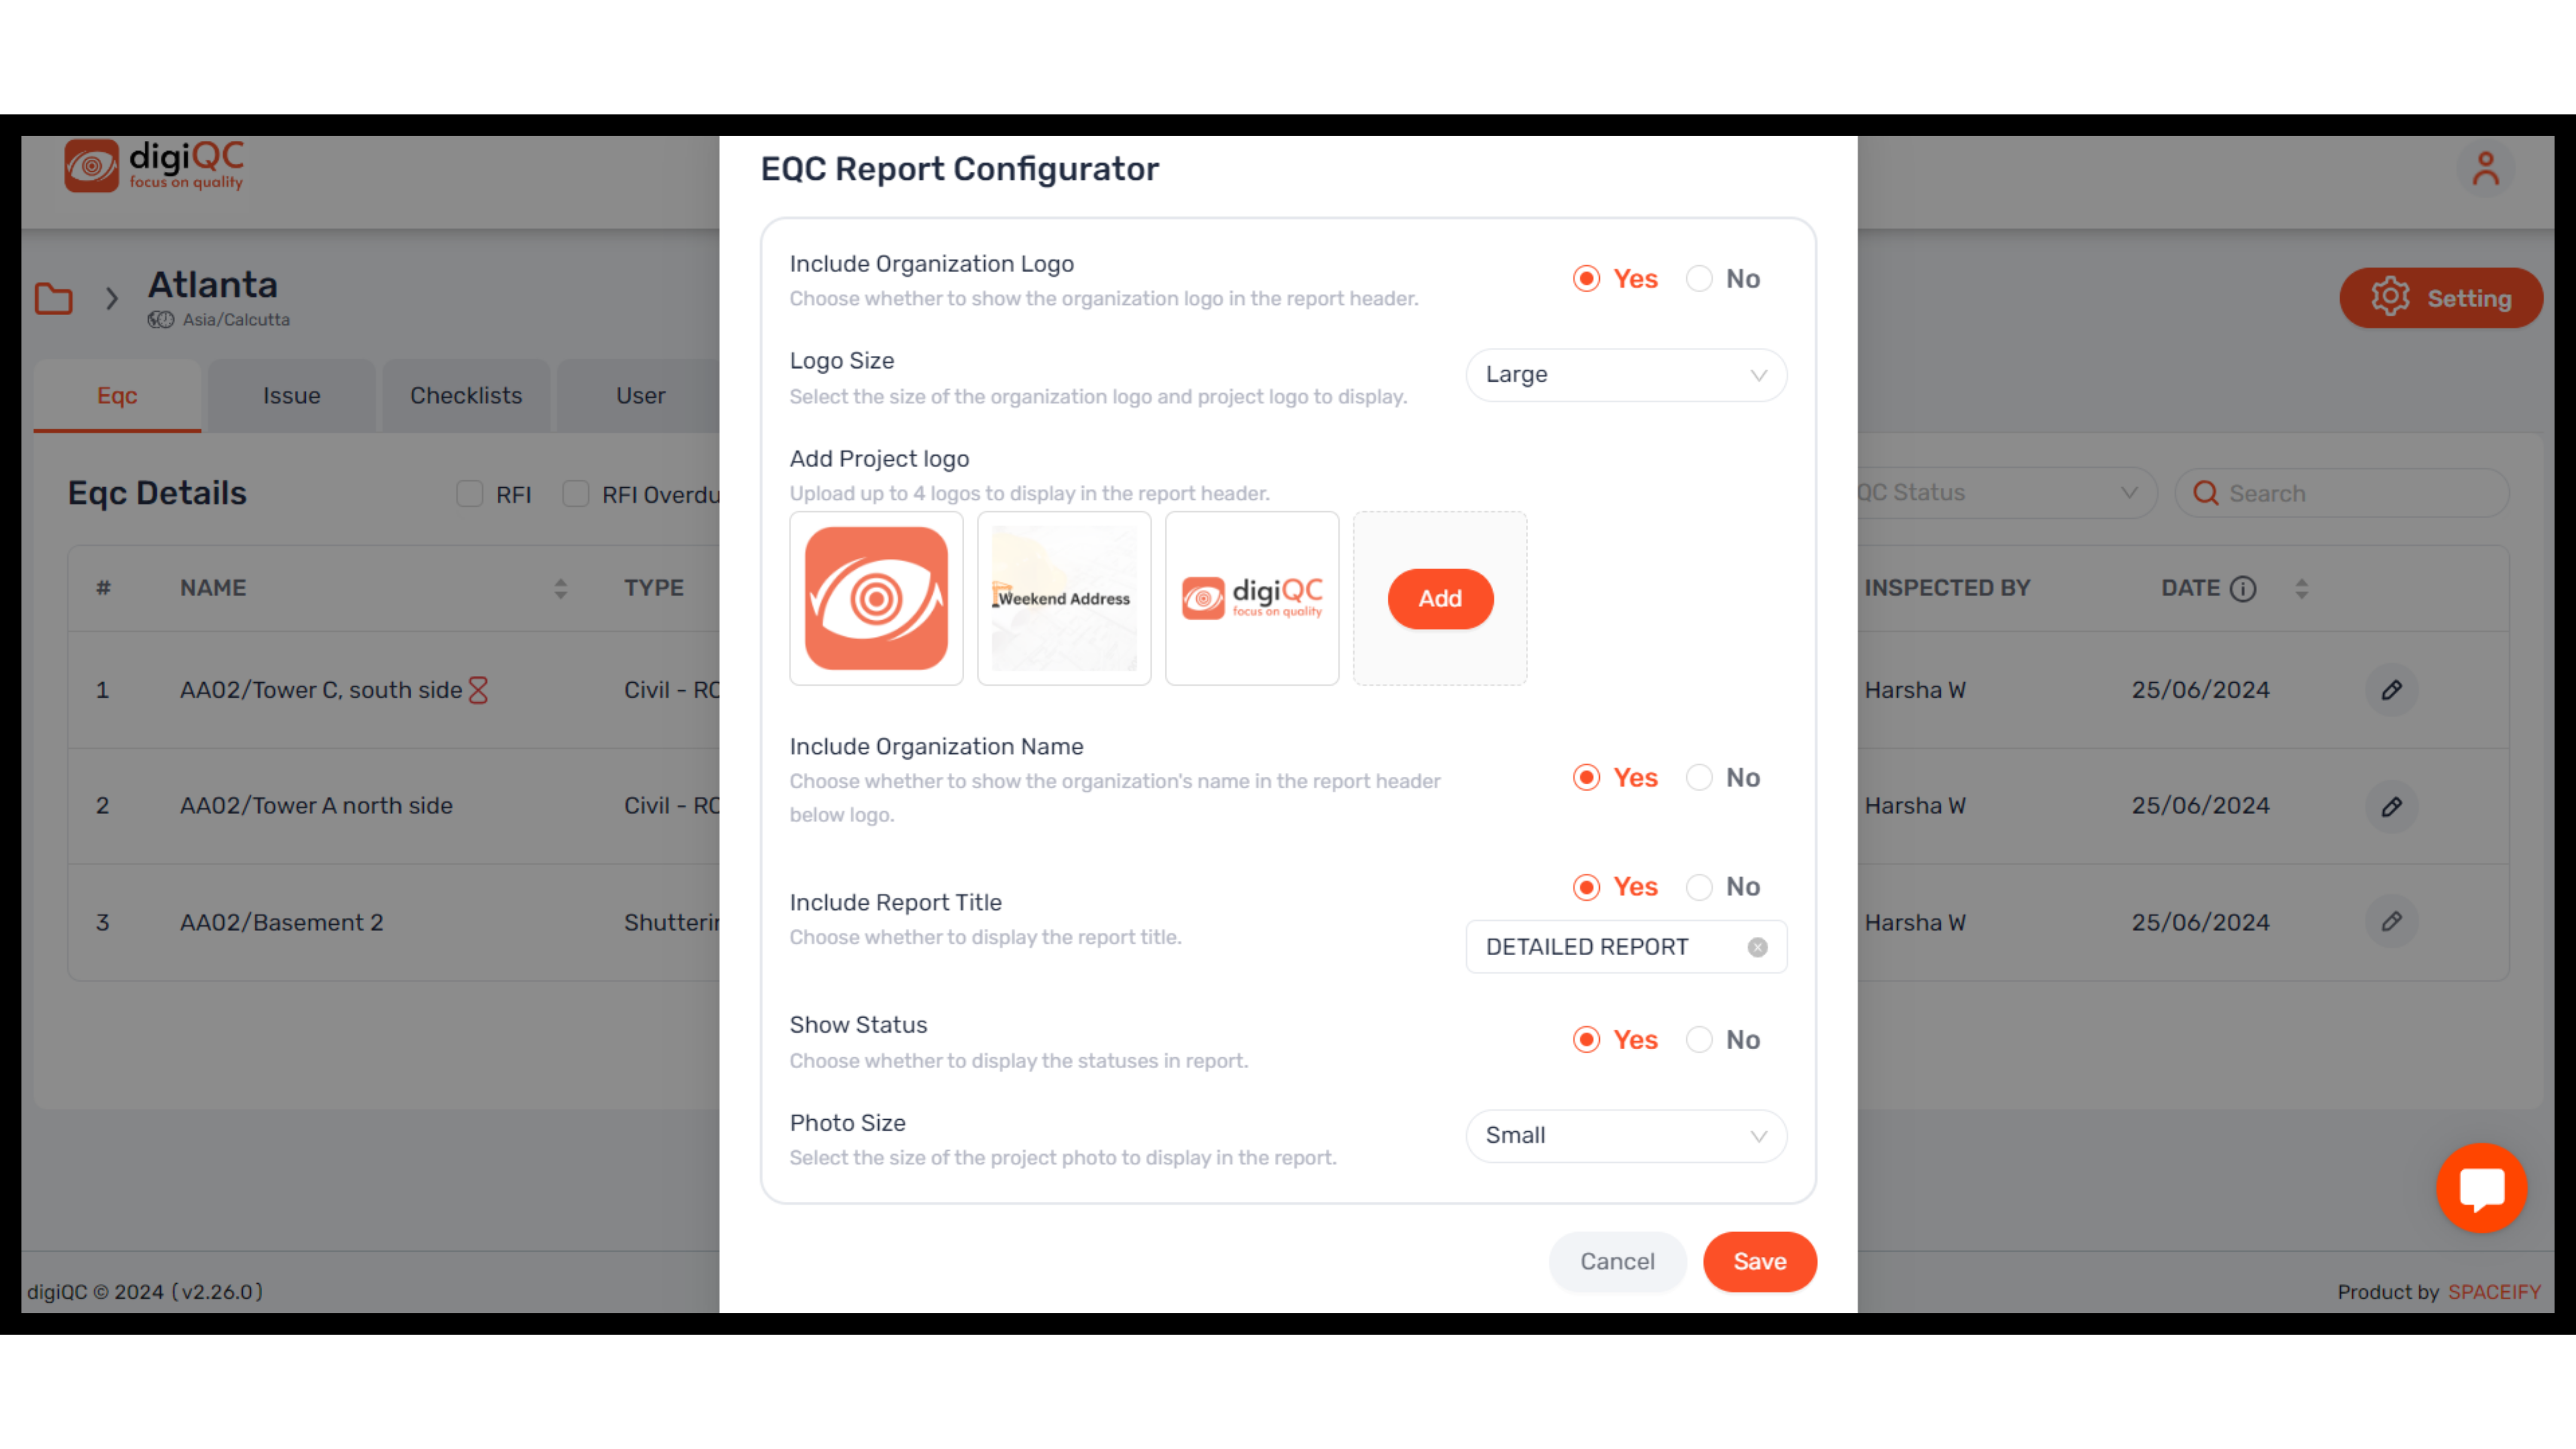
The EQC Report Configurator allows you to customize various elements of your report to better suit your project needs. Here's a guide on how to configure your report based on the options available in the interface:

Include Organization Logo
Why: You can choose whether to display your organization's logo in the report header. This adds a professional touch and ensures brand recognition.
How: Toggle between "Yes" and "No." If "Yes" is selected, the logo will appear at the top of your report.
Logo Size
Why: Adjusting the logo size ensures the logo fits well with other content in the report and looks aesthetically pleasing.
How: Use the dropdown to select the desired size. Options include "Small," "Medium," and "Large."
Add Project Logo
Why: Uploading a project-specific logo helps differentiate reports by project and ensures clear branding for multiple projects.
How: Click "Add" to upload up to four logos to appear in the report header alongside the organization logo.
Include Organization Name
Why: You can decide whether or not to display the name of the organization along with the logo for additional clarity.
How: Choose "Yes" or "No" to include or exclude the organization's name in the report.
Include Report Title
Why: A report title helps clearly define the purpose or scope of the report. The name can be customized as per your project's needs.
How: Select "Yes" to include the title, and you can customize the title (e.g., "Detailed Report").
Show Status
Why: You can opt to display the statuses of various elements within the report, which provides a quick overview of the current progress and outcomes.
How: Toggle between "Yes" and "No" depending on whether you want the statuses (Pass, Fail, Redo, etc.) to be shown in the report.
Photo Size
Why: Adjust the size of project photos included in the report for better readability and to suit the context of the report.
How: Use the dropdown to choose between "Small," "Medium," or "Large" photo sizes depending on how prominent you want the images to appear in the report.
Once you've made your selections, click on the "Save" button at the bottom of the screen to apply your configuration settings to the report.
This simple customization process allows you to create reports that are both visually appealing and functional, tailored to your project and organizational requirements.
Two types of PDF report can be downloaded: Digital & Print version
Sample file: https://drive.google.com/drive/folders/18DLR-kMl3CikId9FzFEDHglsnIYgSLCz?usp=drive_link