Click on the “Checklist” tab
Click on the “+Add” button
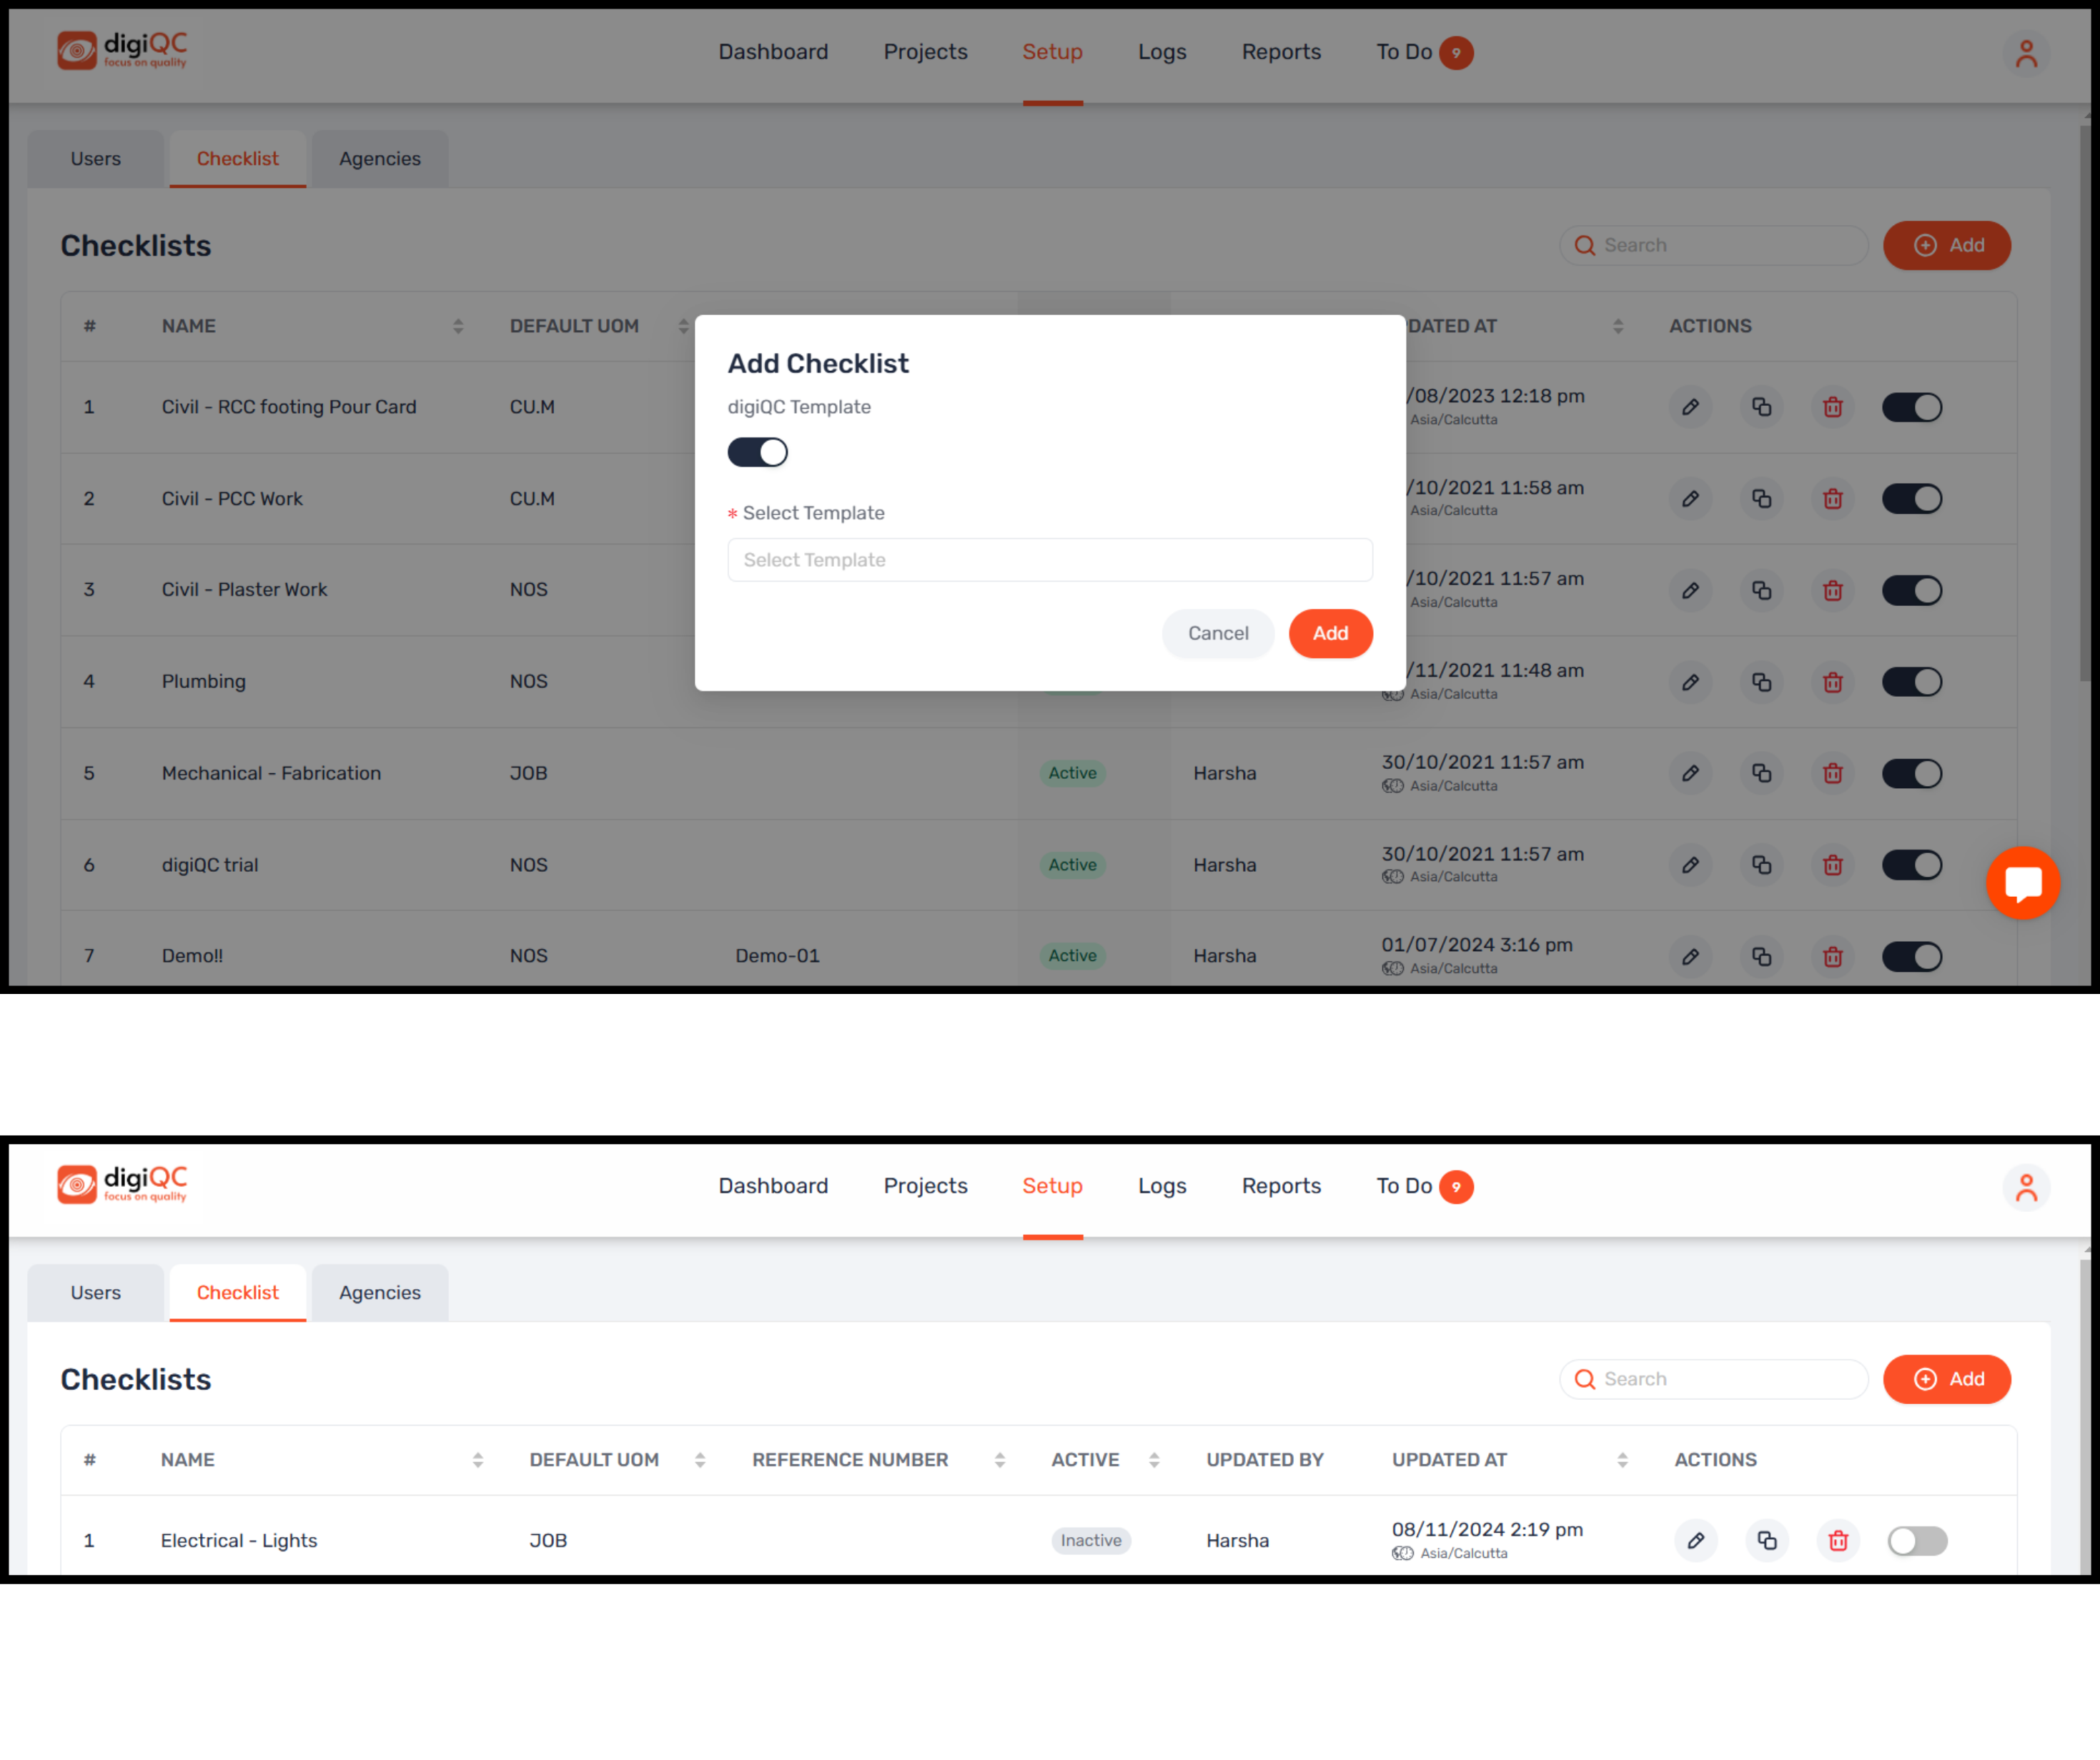
Box will open wherein you need to click on digiQC templates (ready to use). Turn on that toggle button
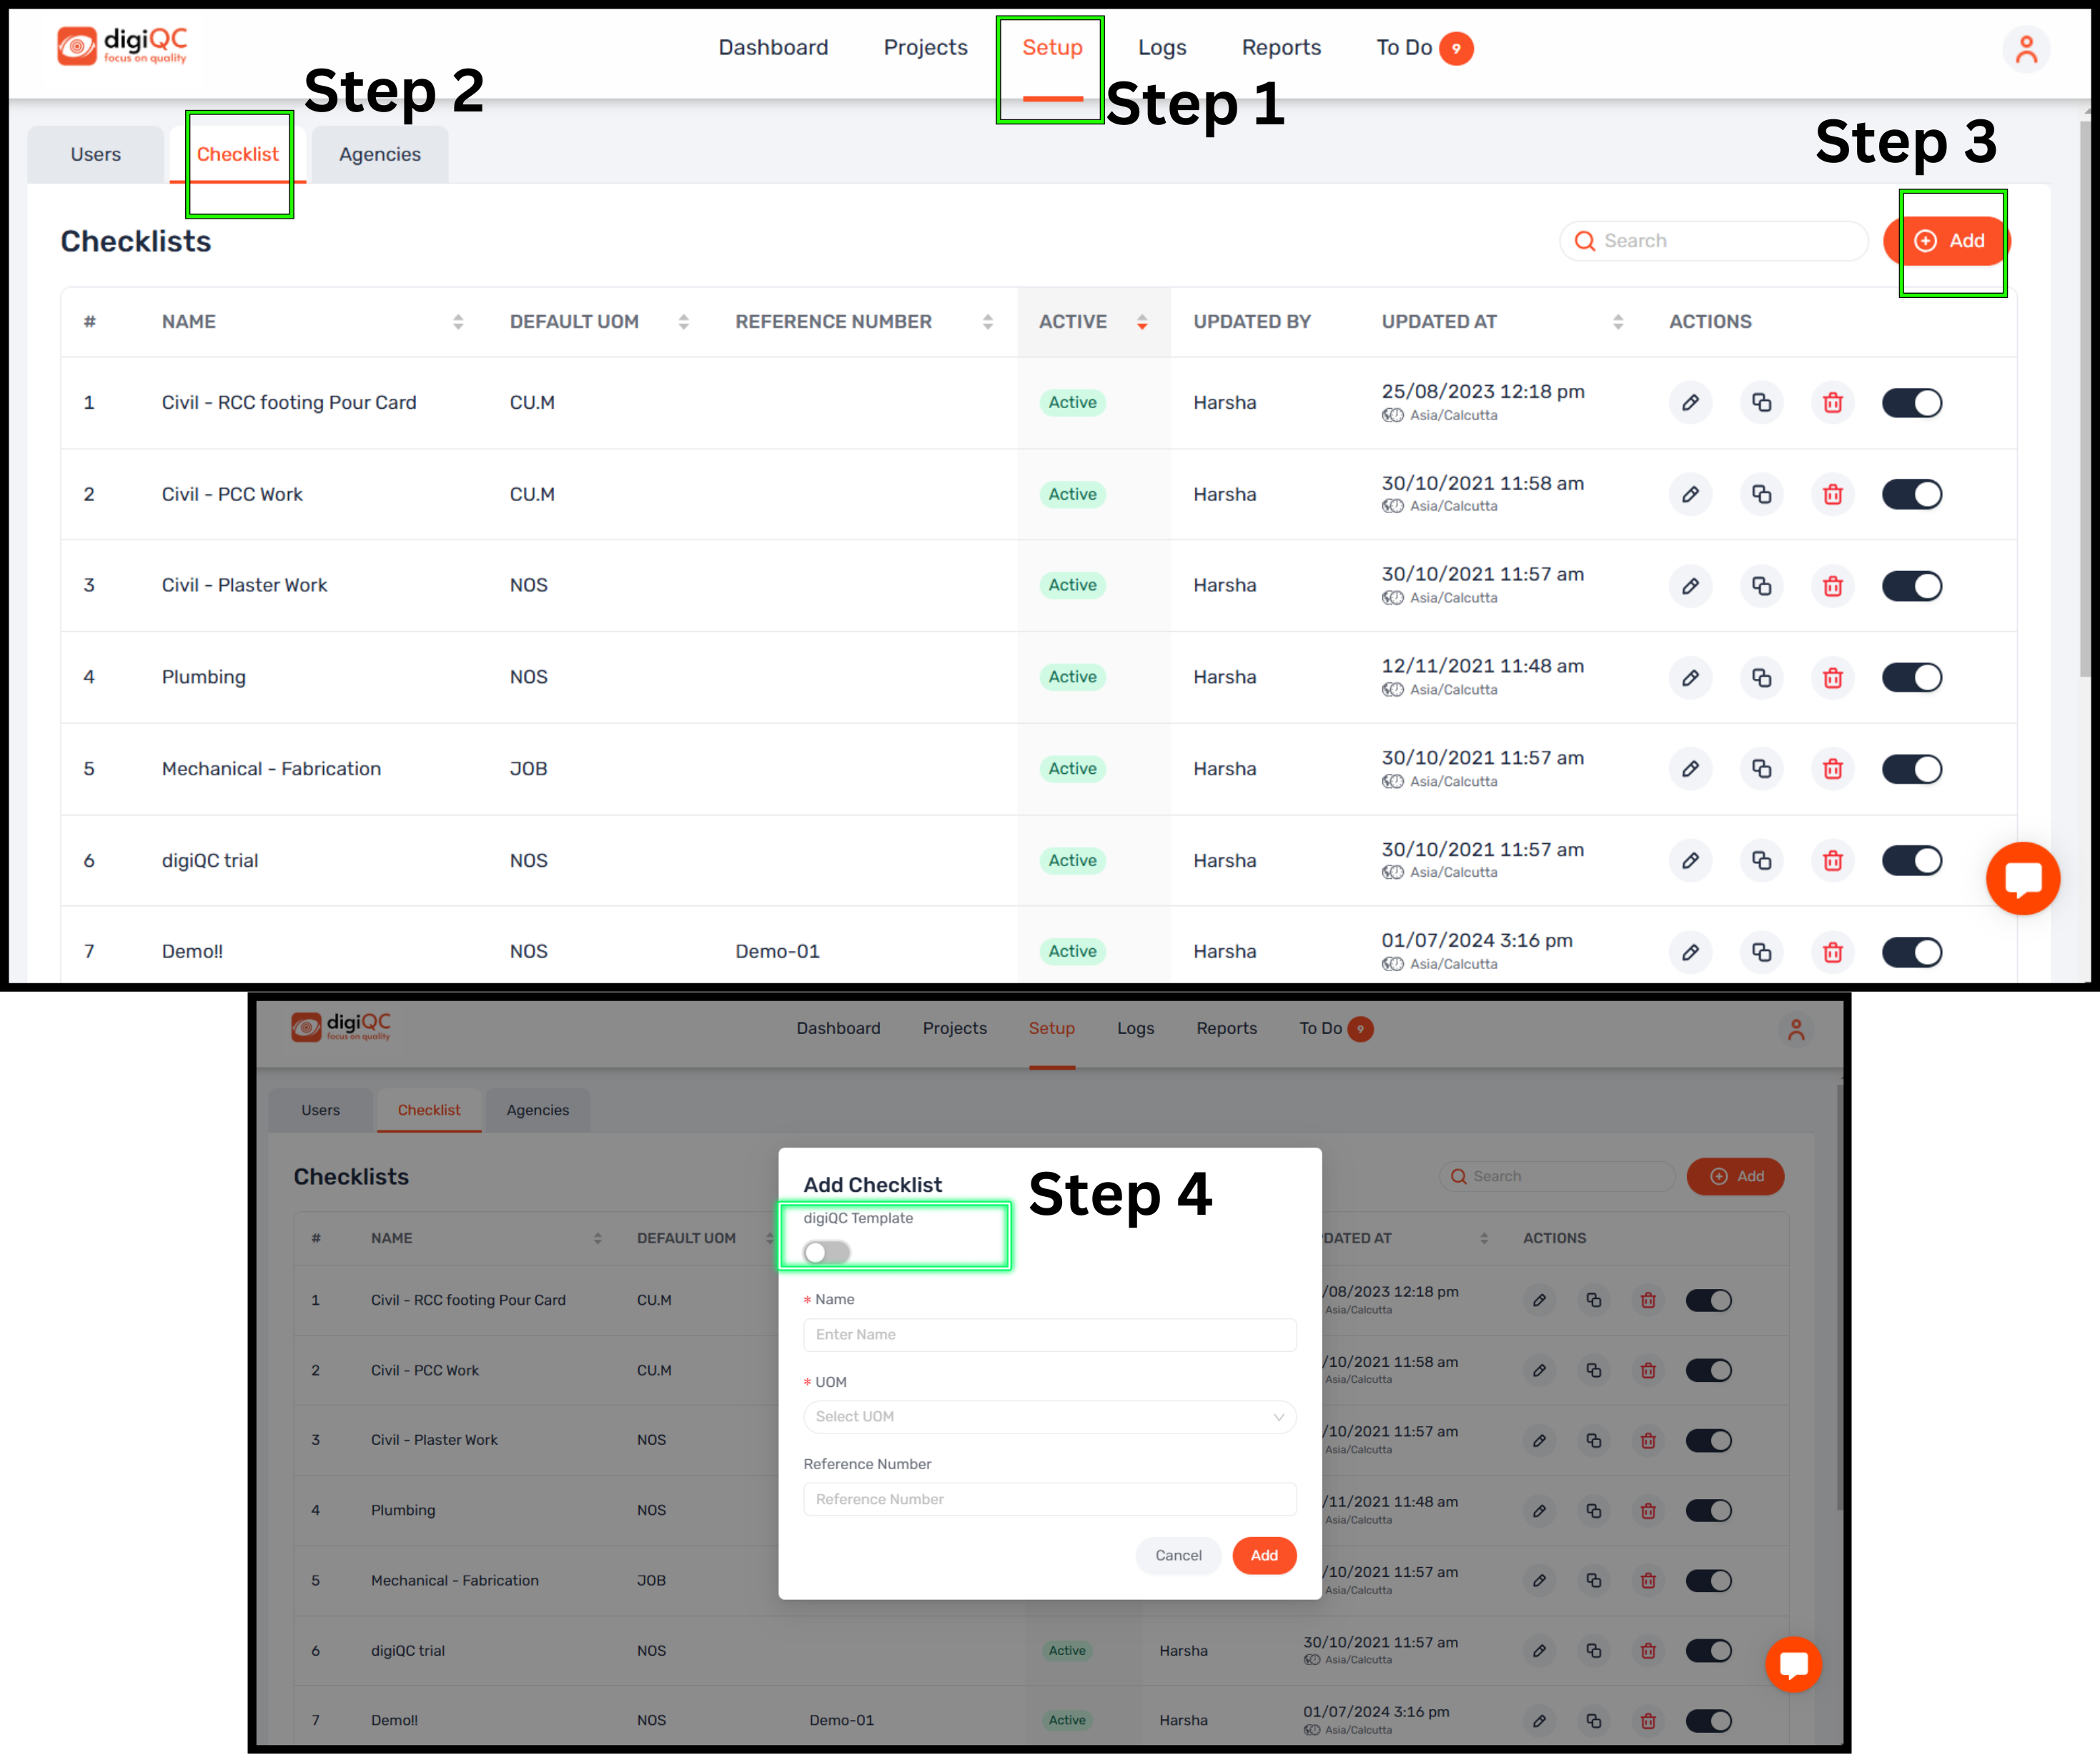
Click on “Select Template” and select one or multiple Checklist.
Then click on the “Add” button.
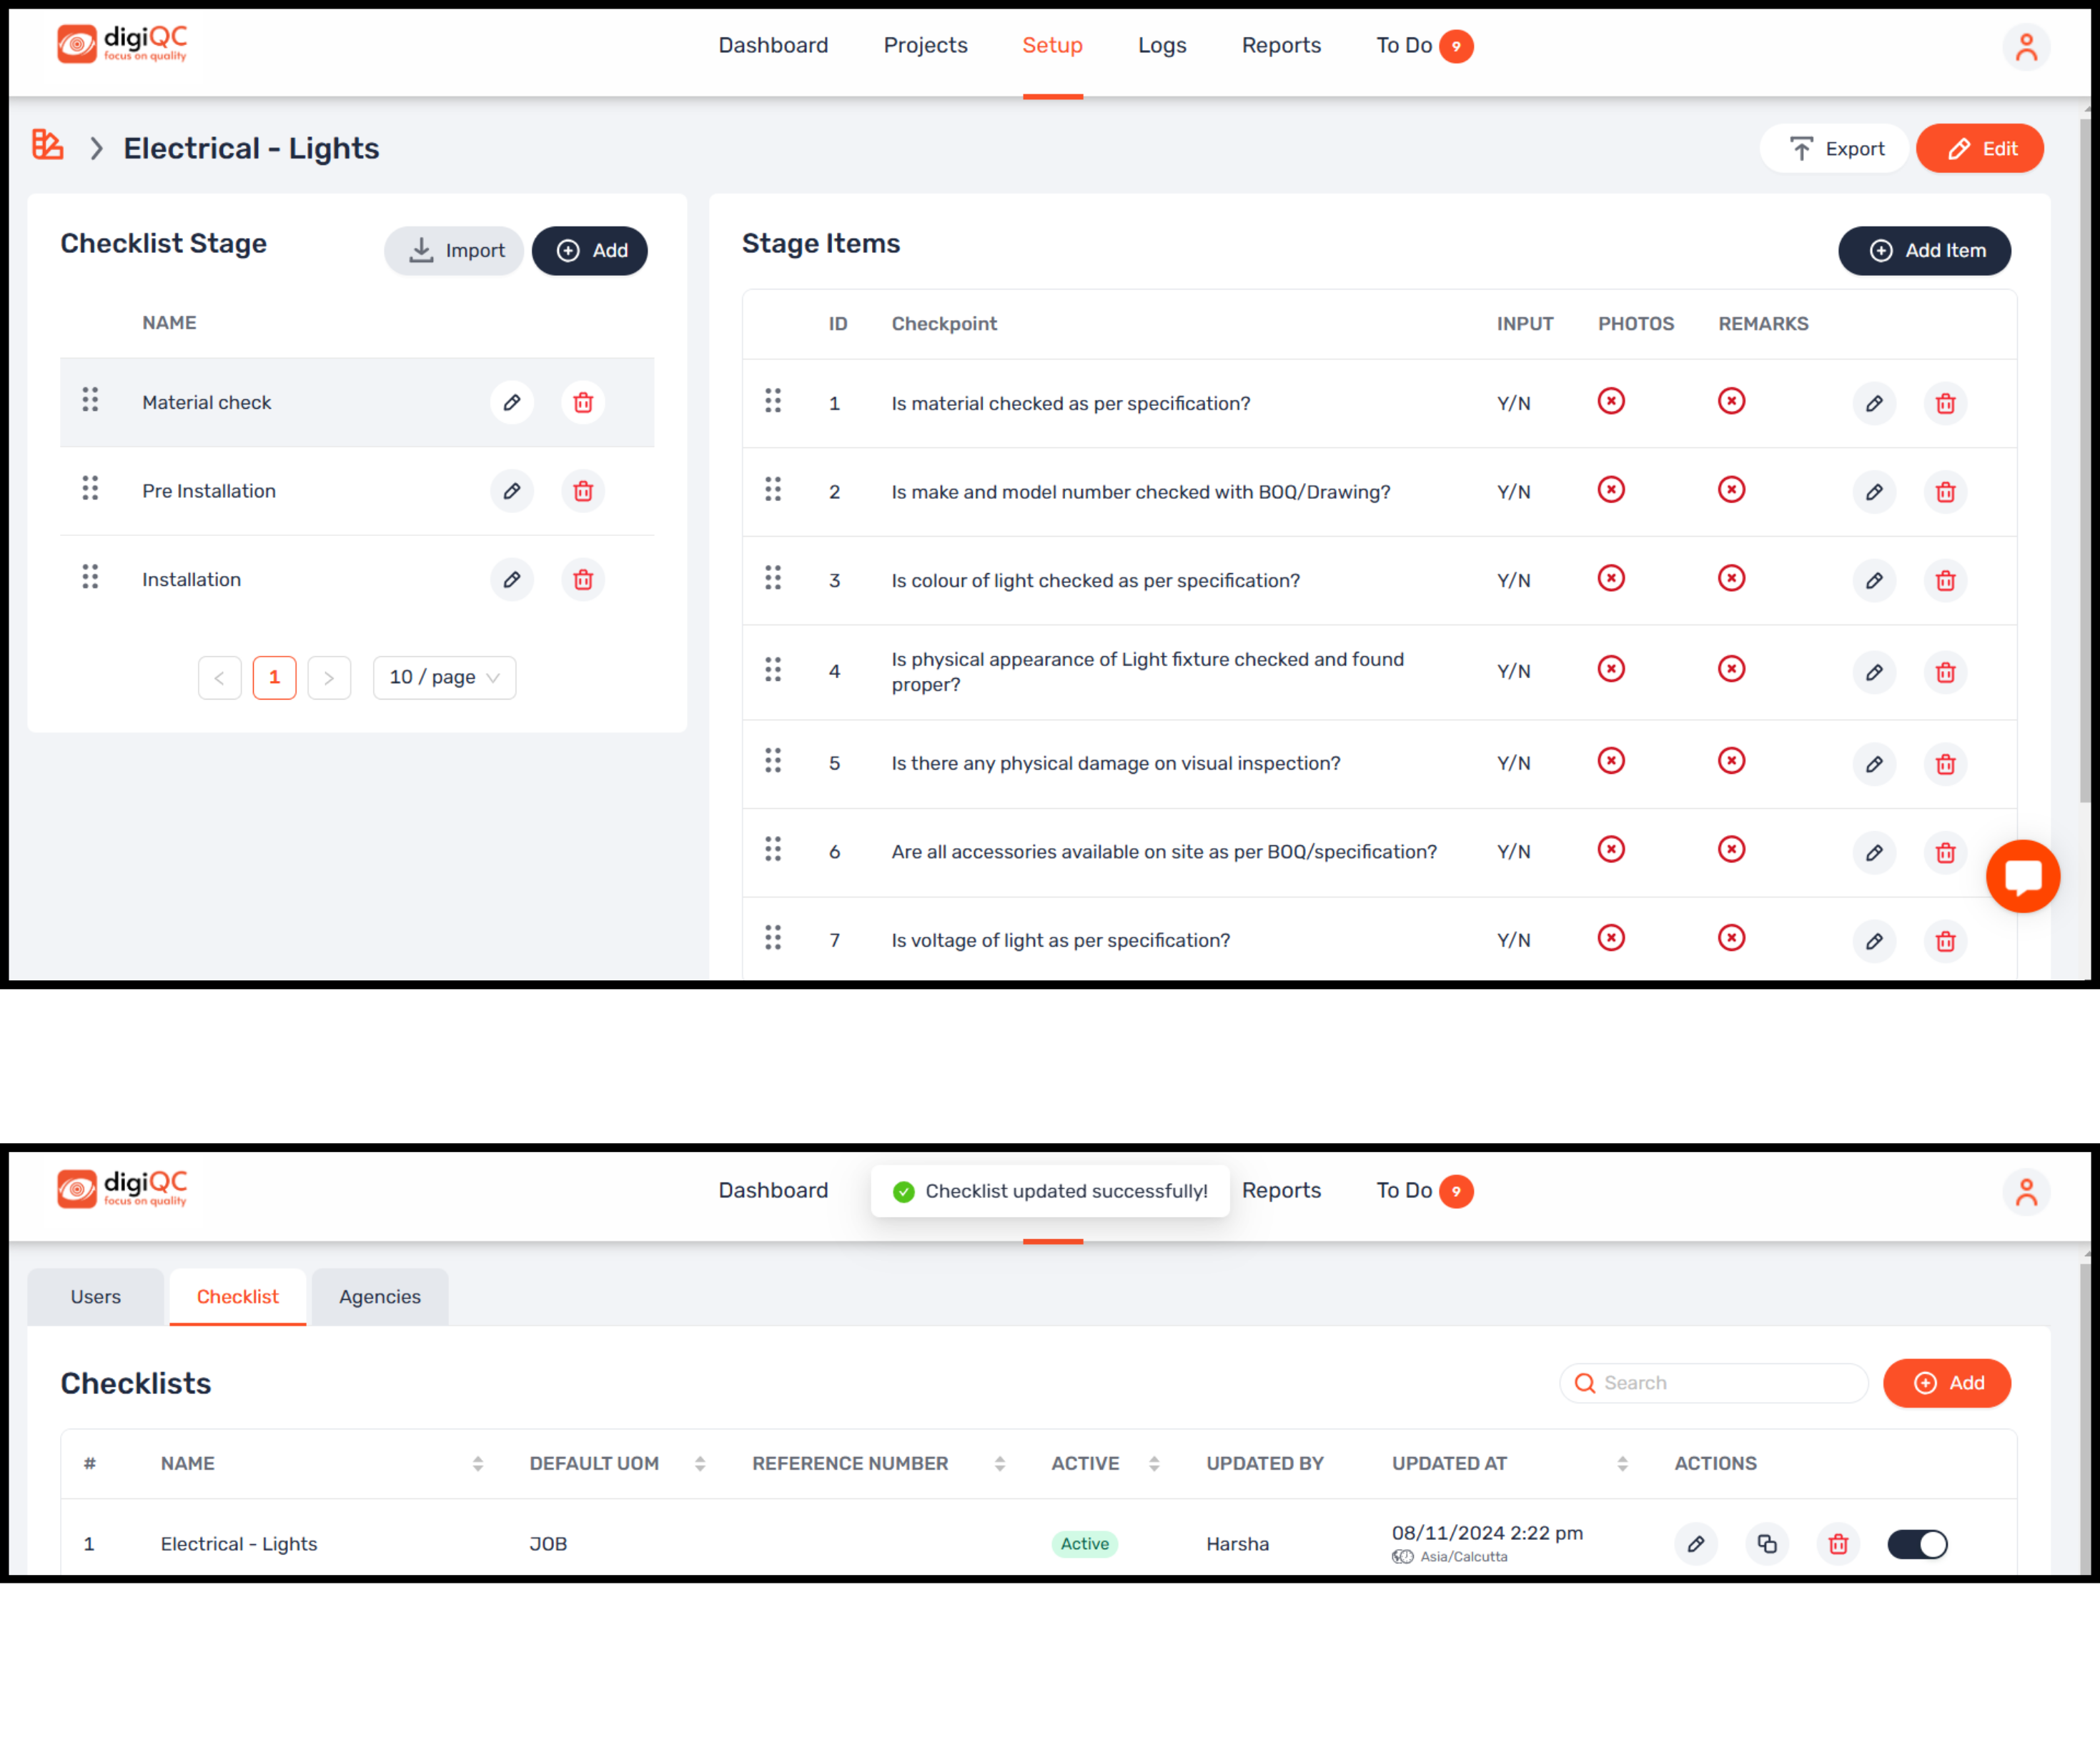
Click on the checklist and get inside it
You will get to see Checklist stages at the left-hand side and the Checklist points towards the right hand side.
If you want to rename the stage name then click on the pencil button and you can even delete the stage by clicking on the delete symbol next to the pencil button in the action column.
For adding a new stage click on the “+Add” button
For changing the sequence of the stages or checkpoints you can drag & drop
You will get a notification of “Checklist added successfully”
Activate the checklist by clicking the toggle button on in the "Actions" column.
Note: Activating the checklist is important because then only you will able to fetch this checklist inside any project for conducting inspections.