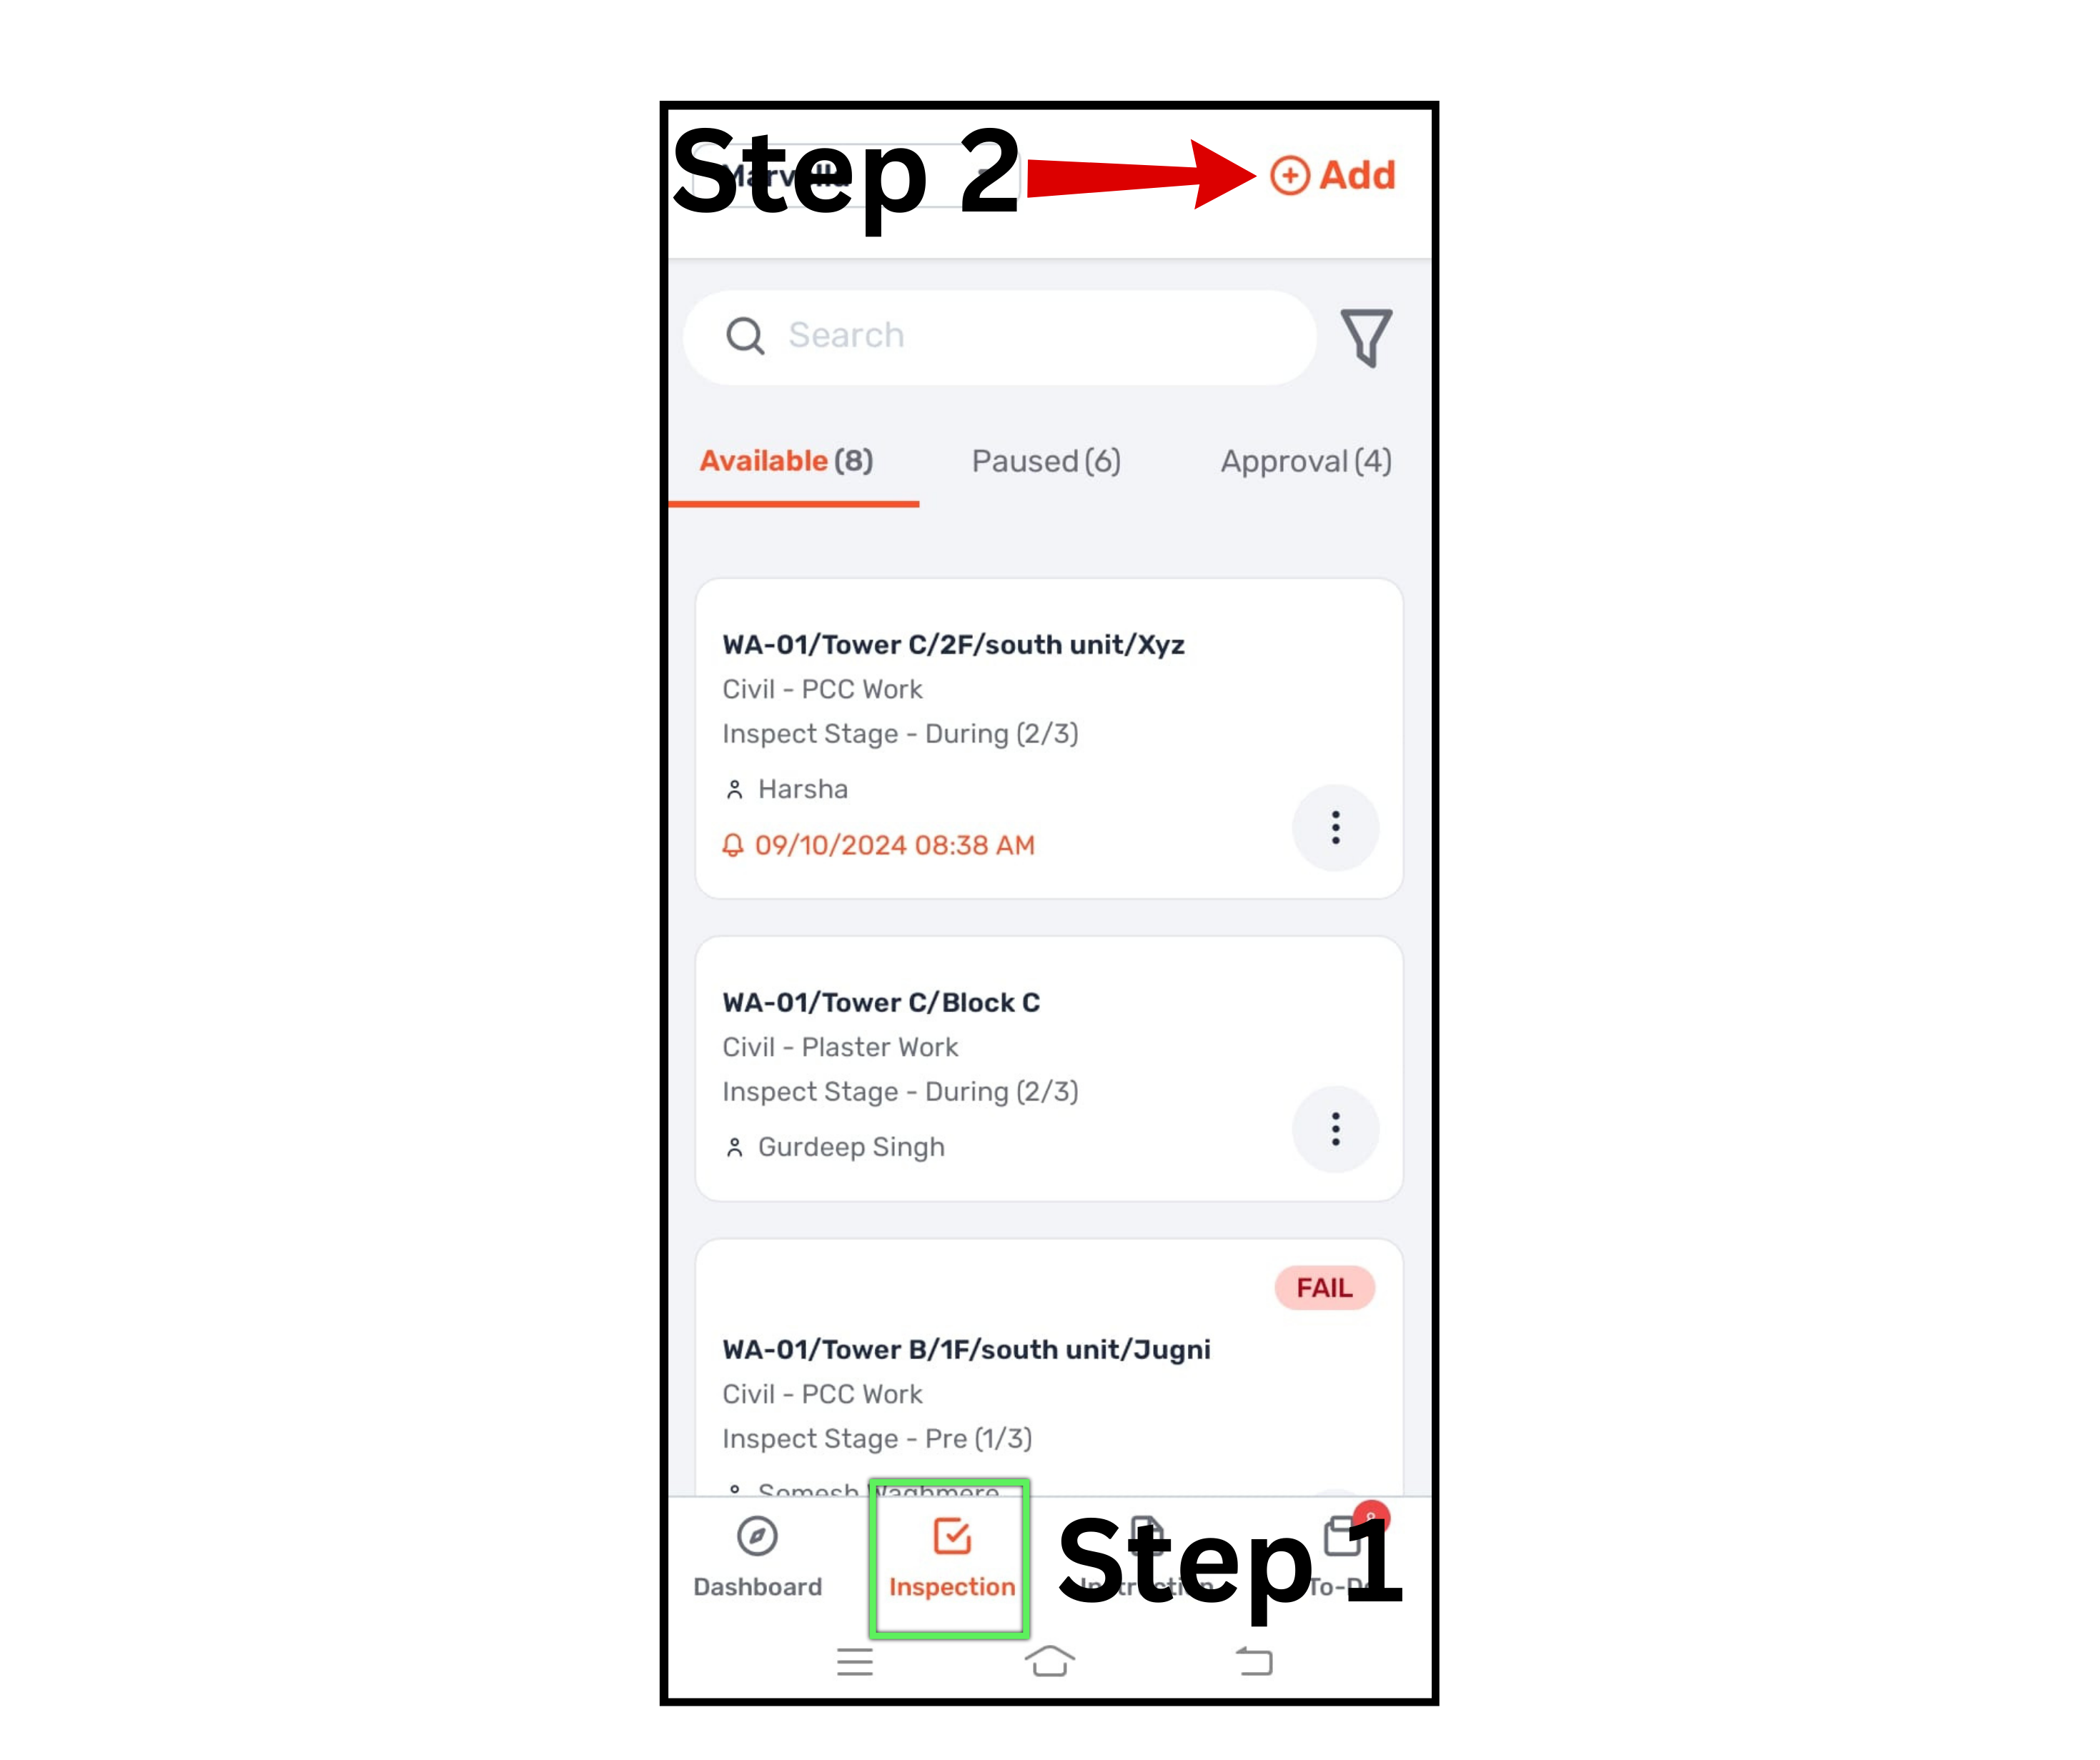
Open the app=>Click on the Inspection below
On the top right corner, click on + Add
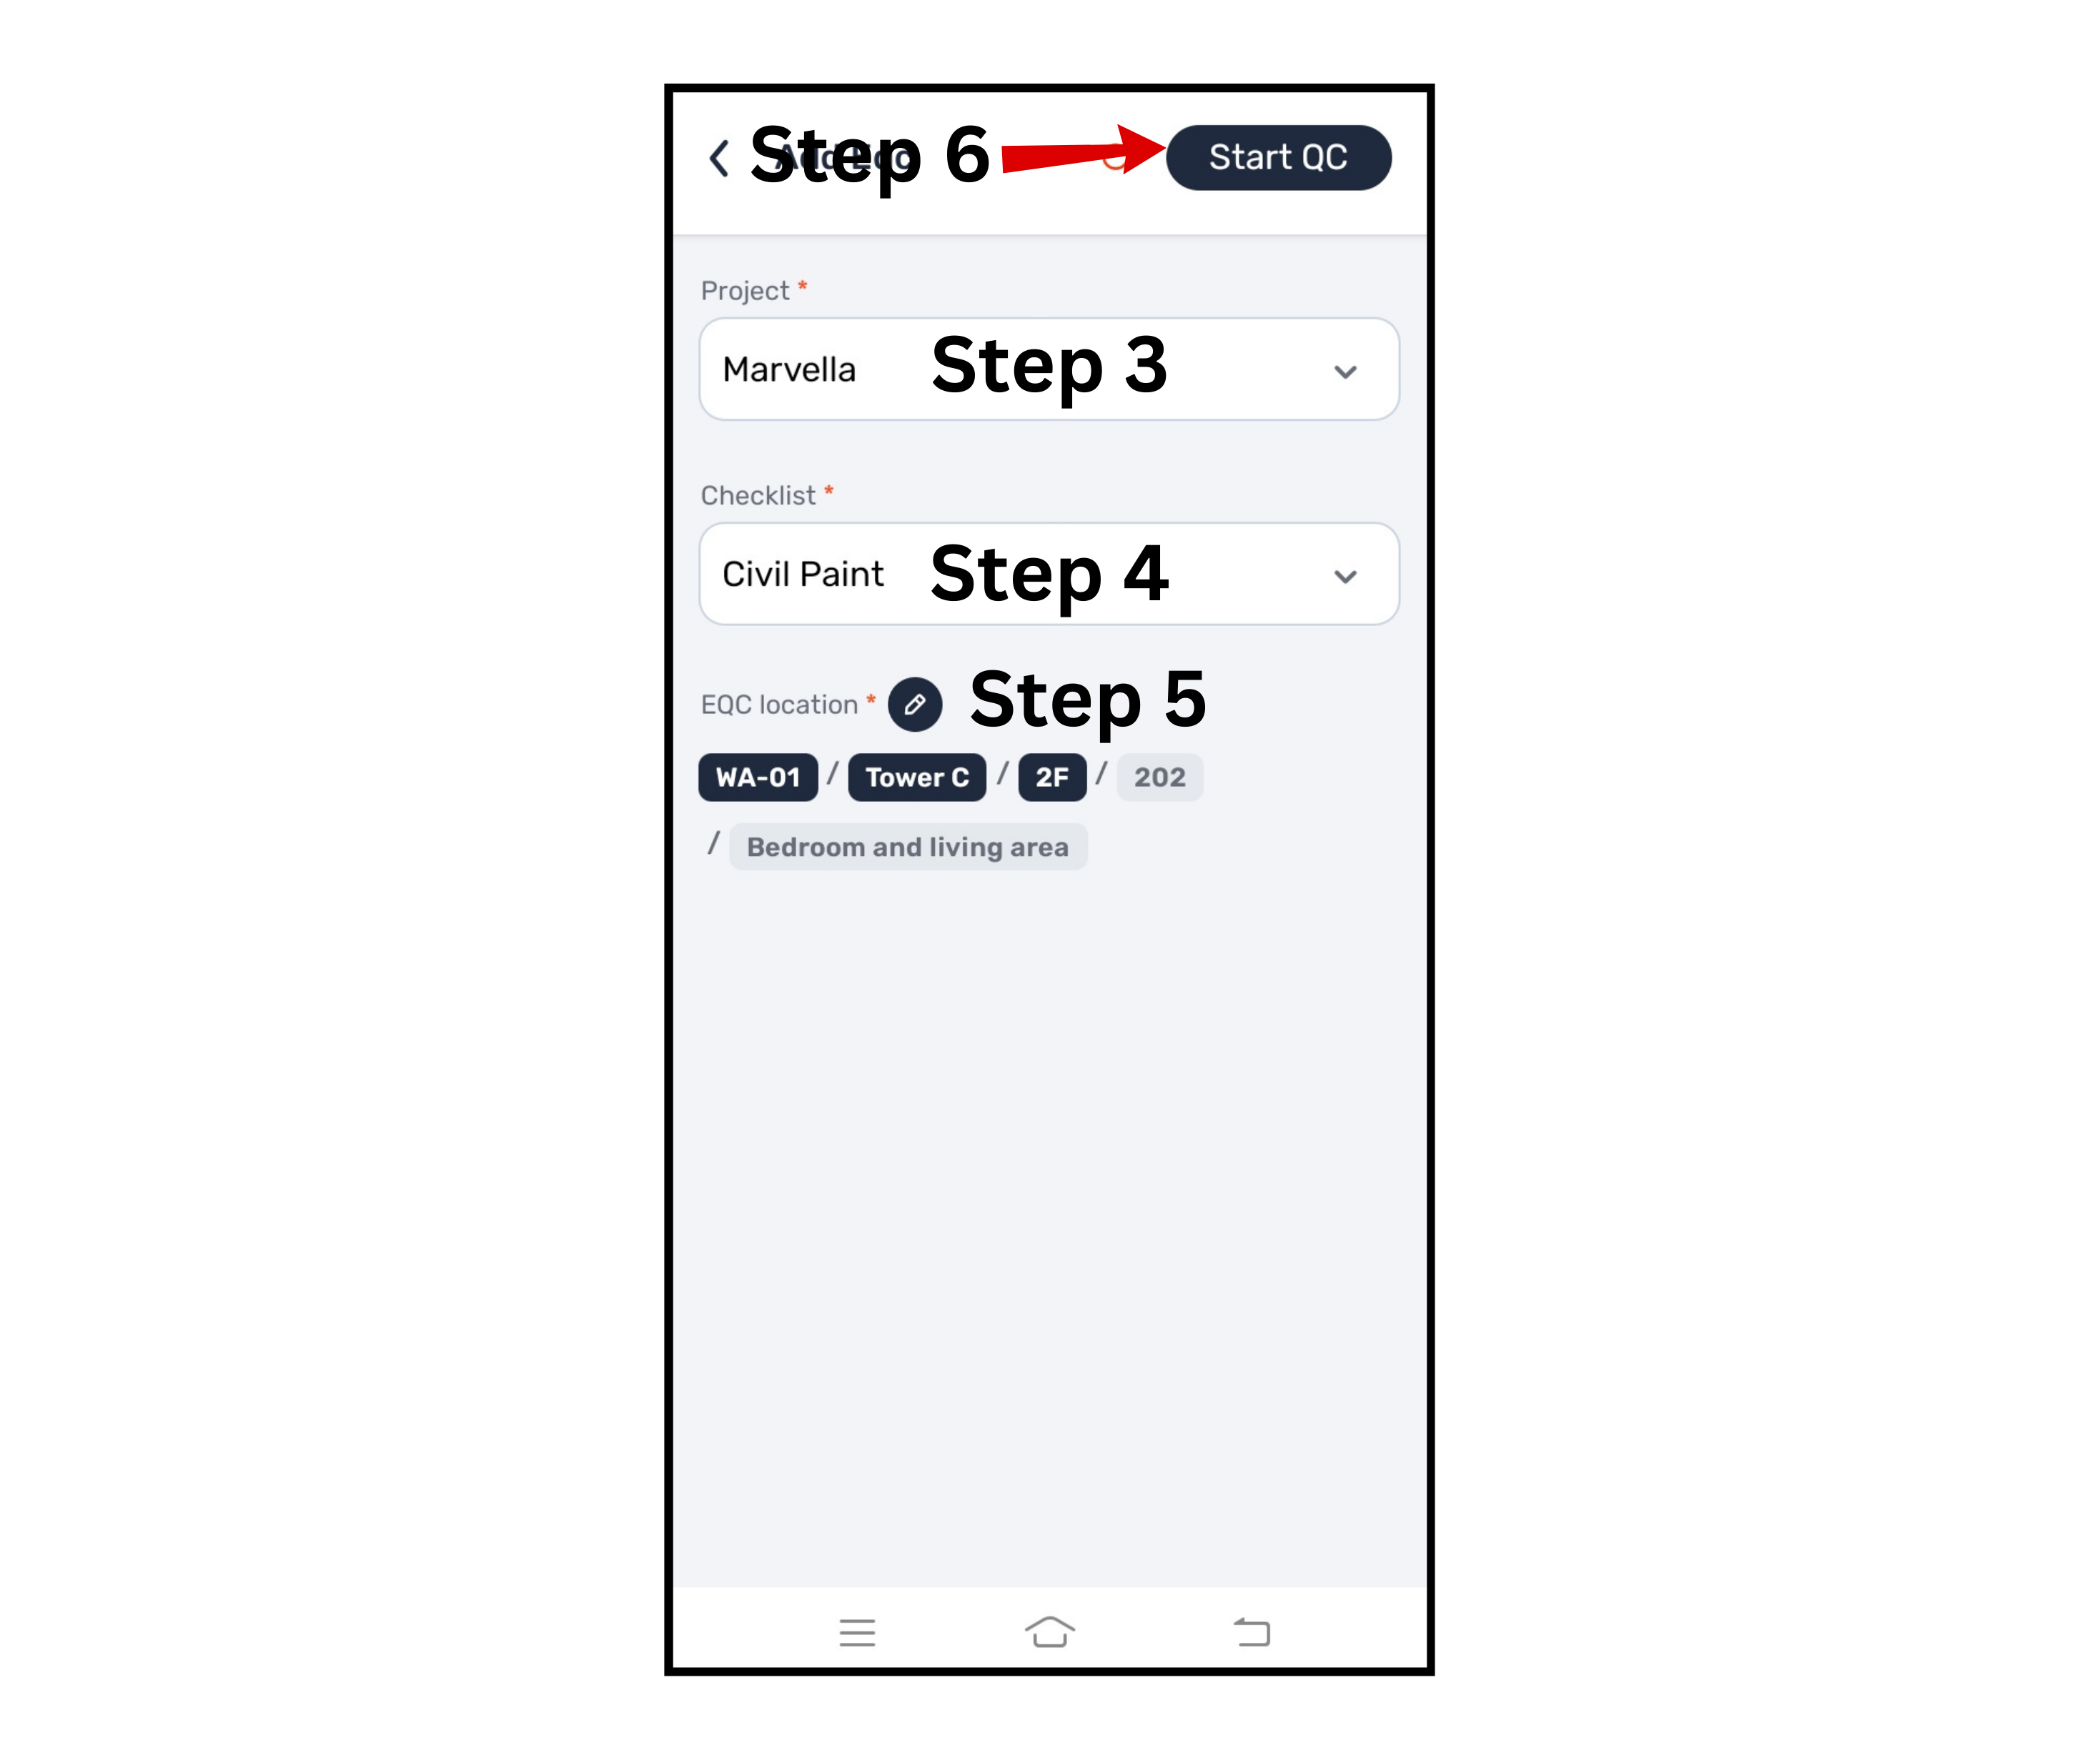
Select project name
Select the Checklist from the drop-down list
Enter the EQC name manually or select from the pre-defined levels and add a custom name
Click on Start QC at the top right corner to start
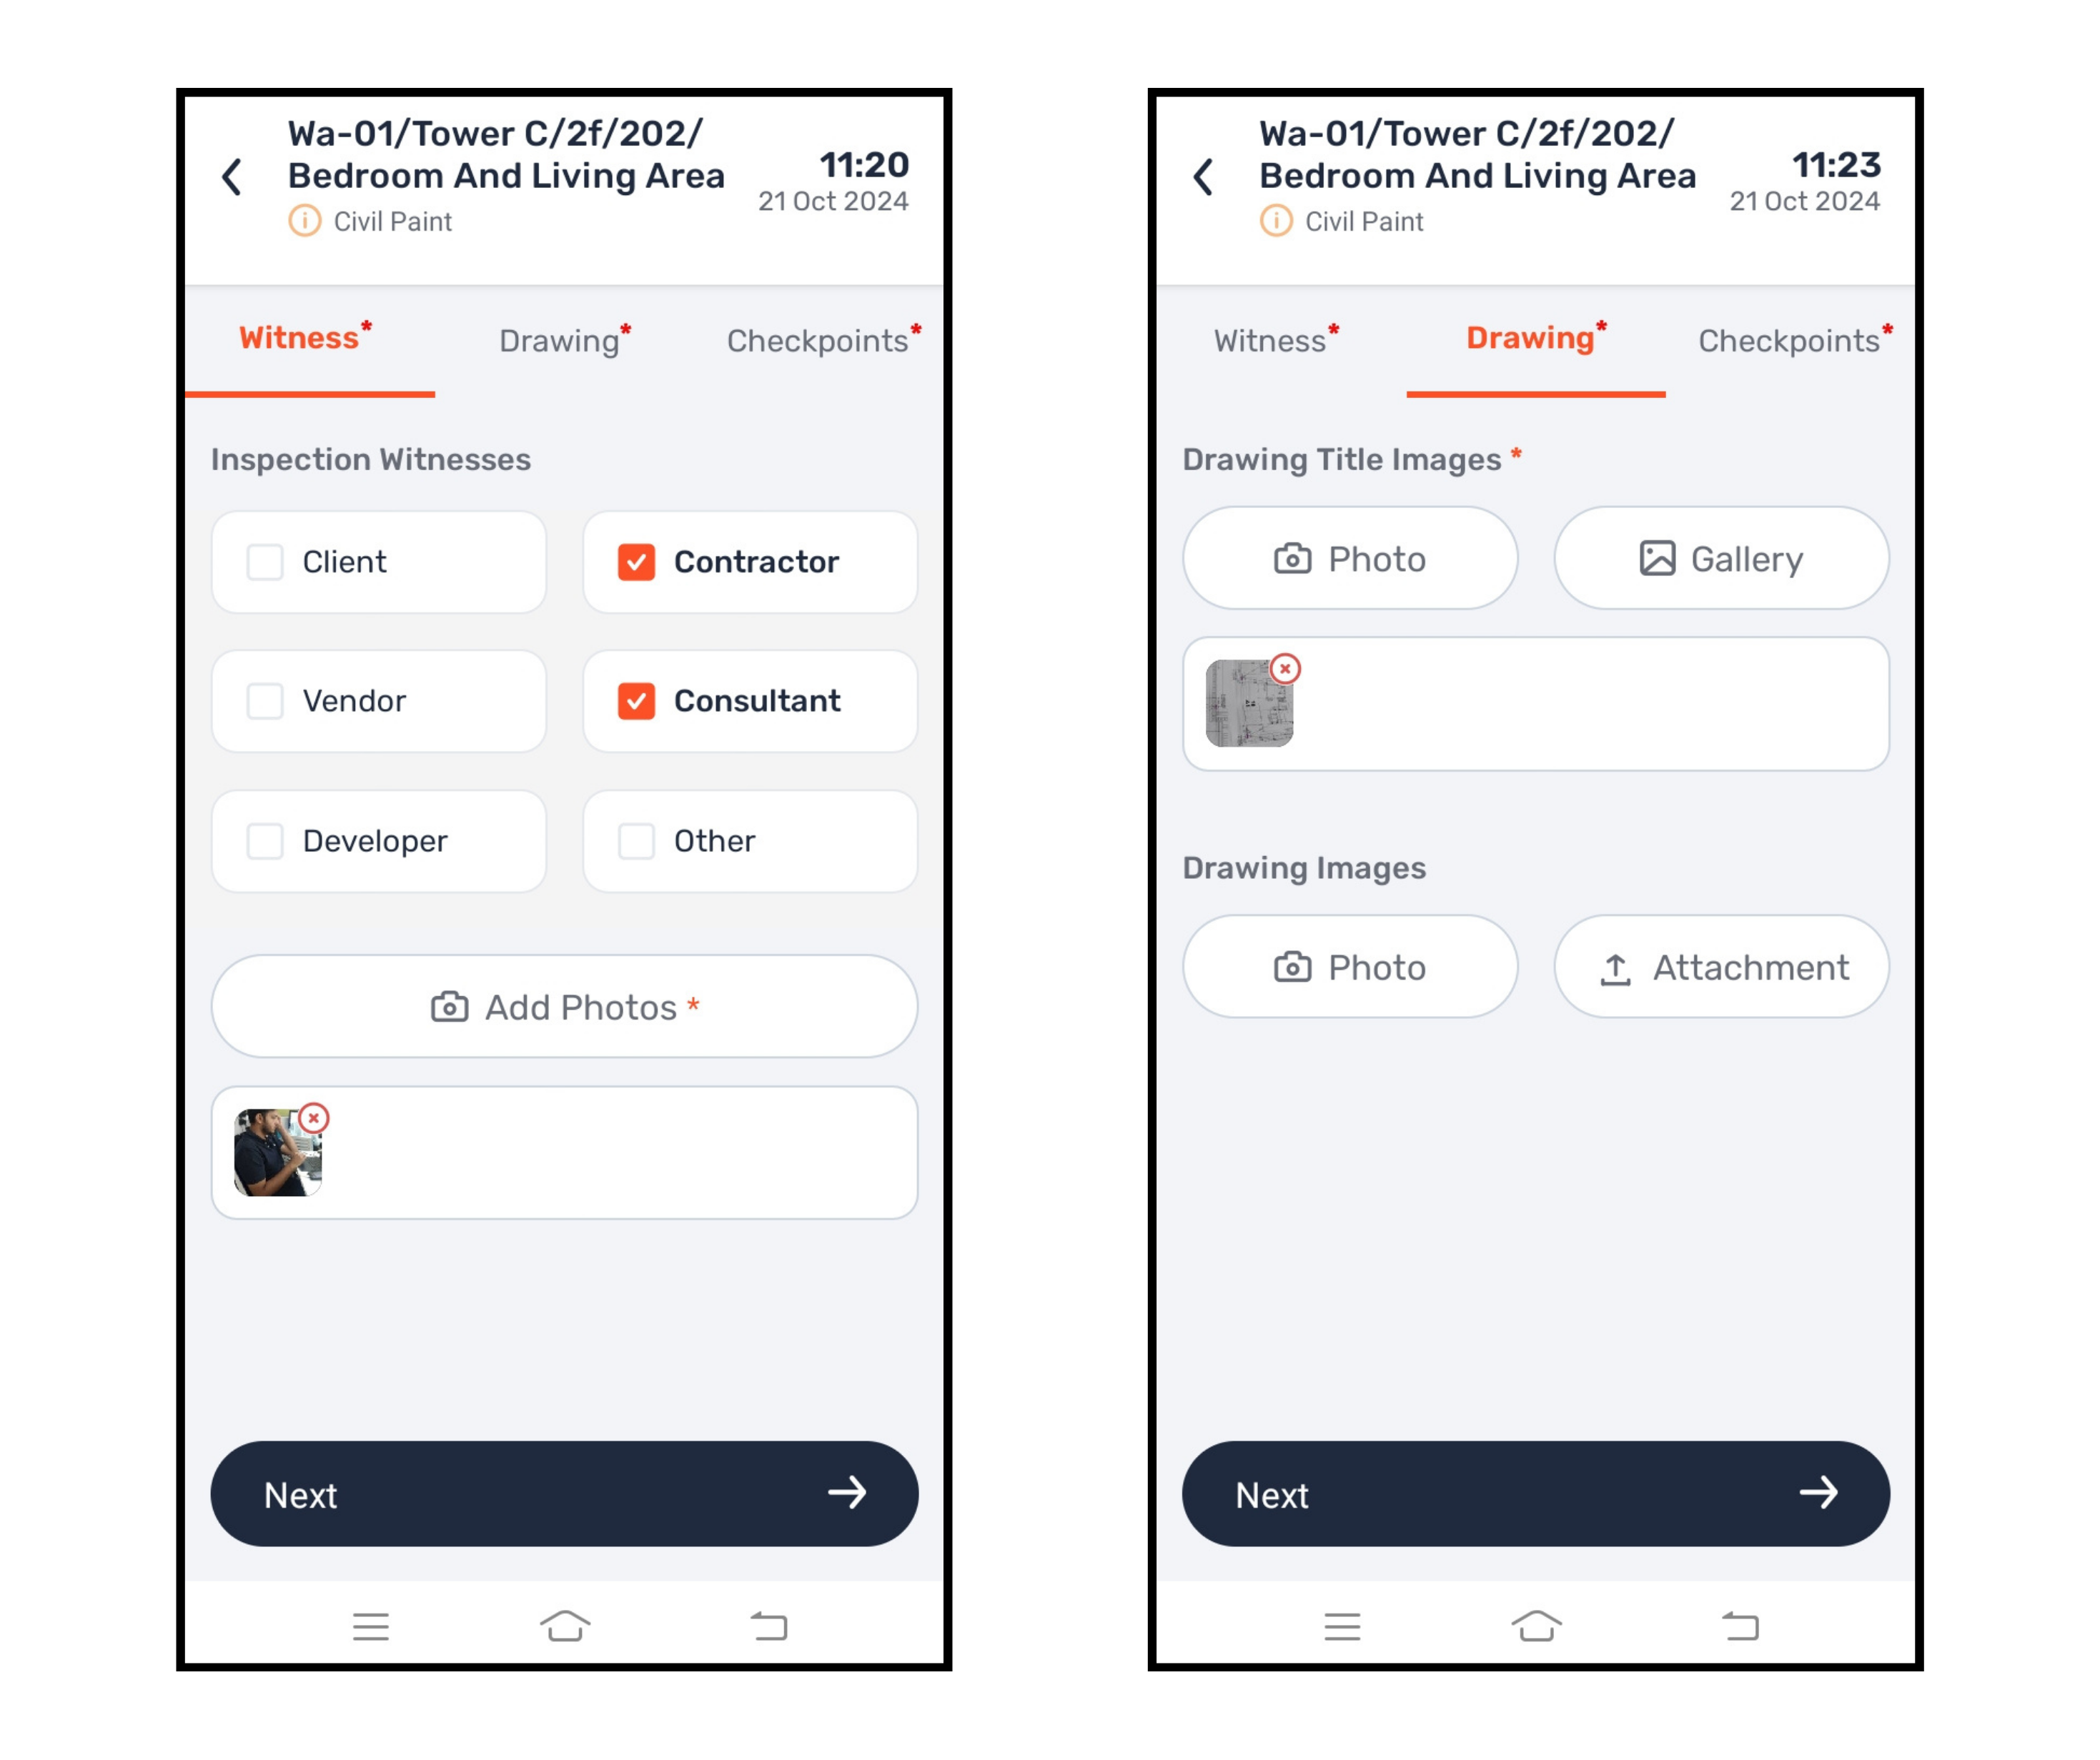
Select the witness who is present at the site while you are doing the inspection and take his photograph then click on the next
Add a reference drawing; if you have a hard copy of the drawings then take a photo, attach it from the gallery, or attach a PDF file then click on the next
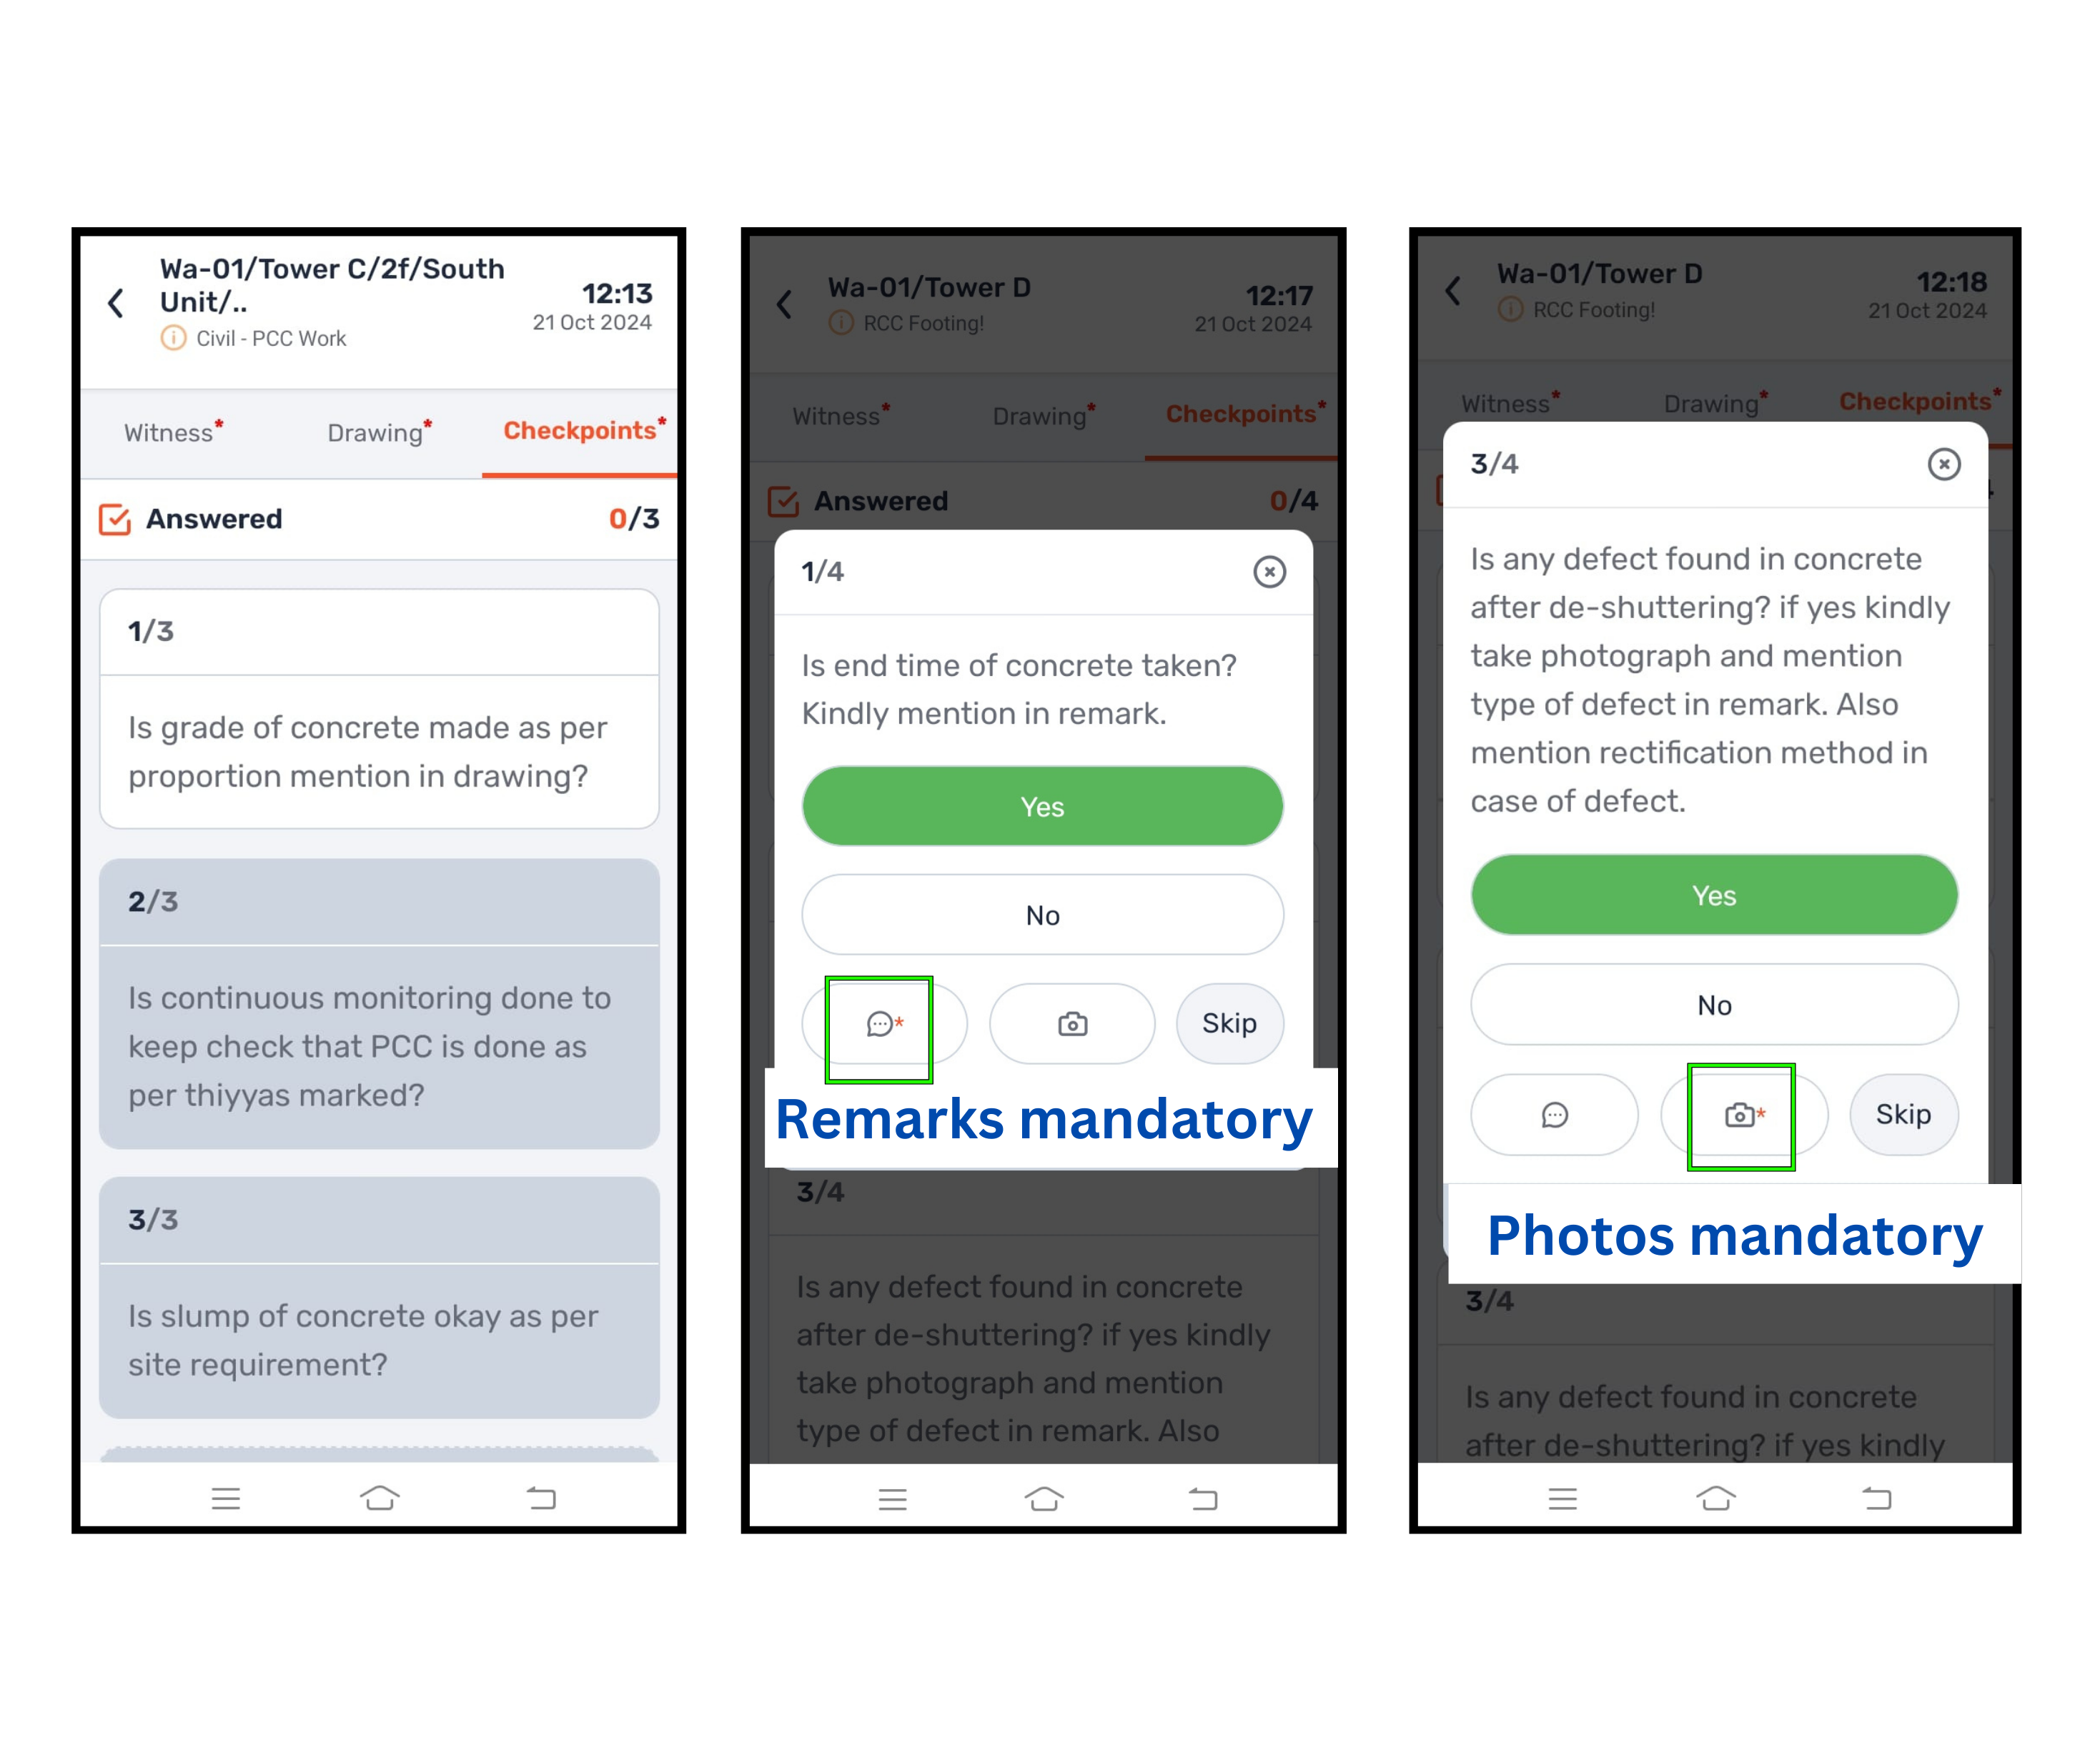
In the checkpoint screen, you need to check each point one by one and select "yes" or "no" according to the work done, and add photos & remarks wherever it is mandatory.
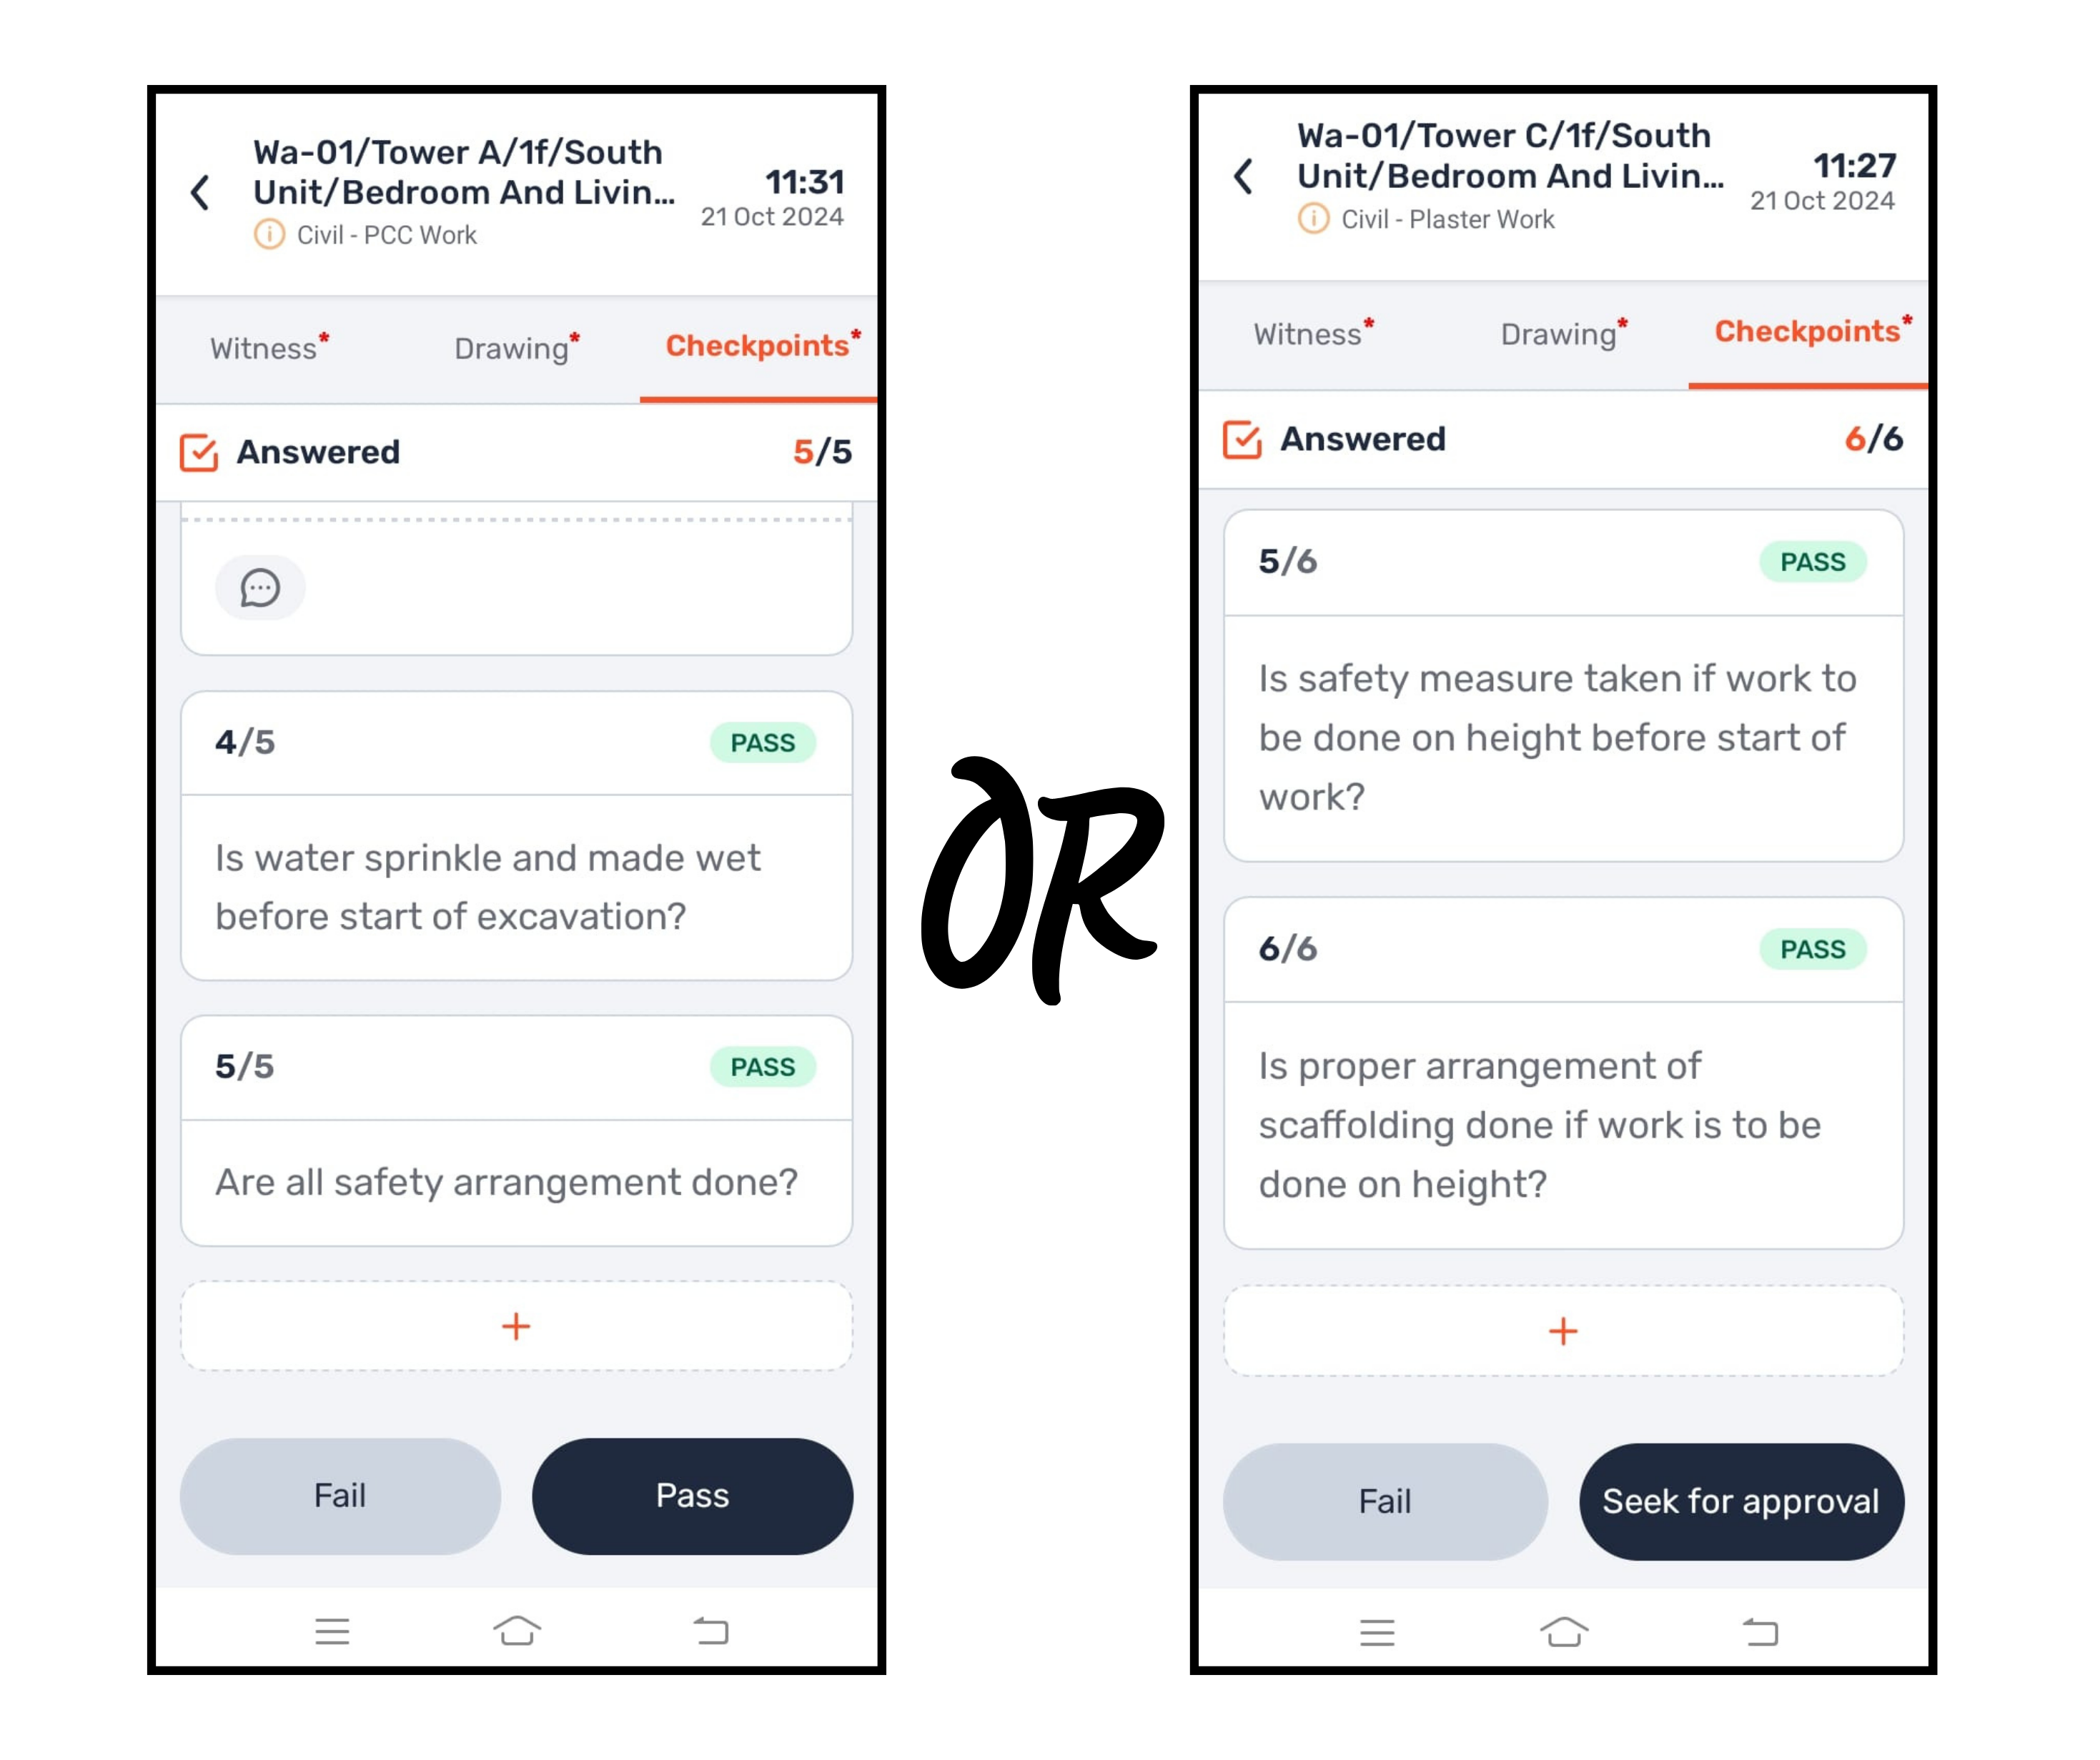
After answering all questions at the end you will get two options: Fail & Pass or Fail & Seek for approval depending on the process which is been selected by your organization
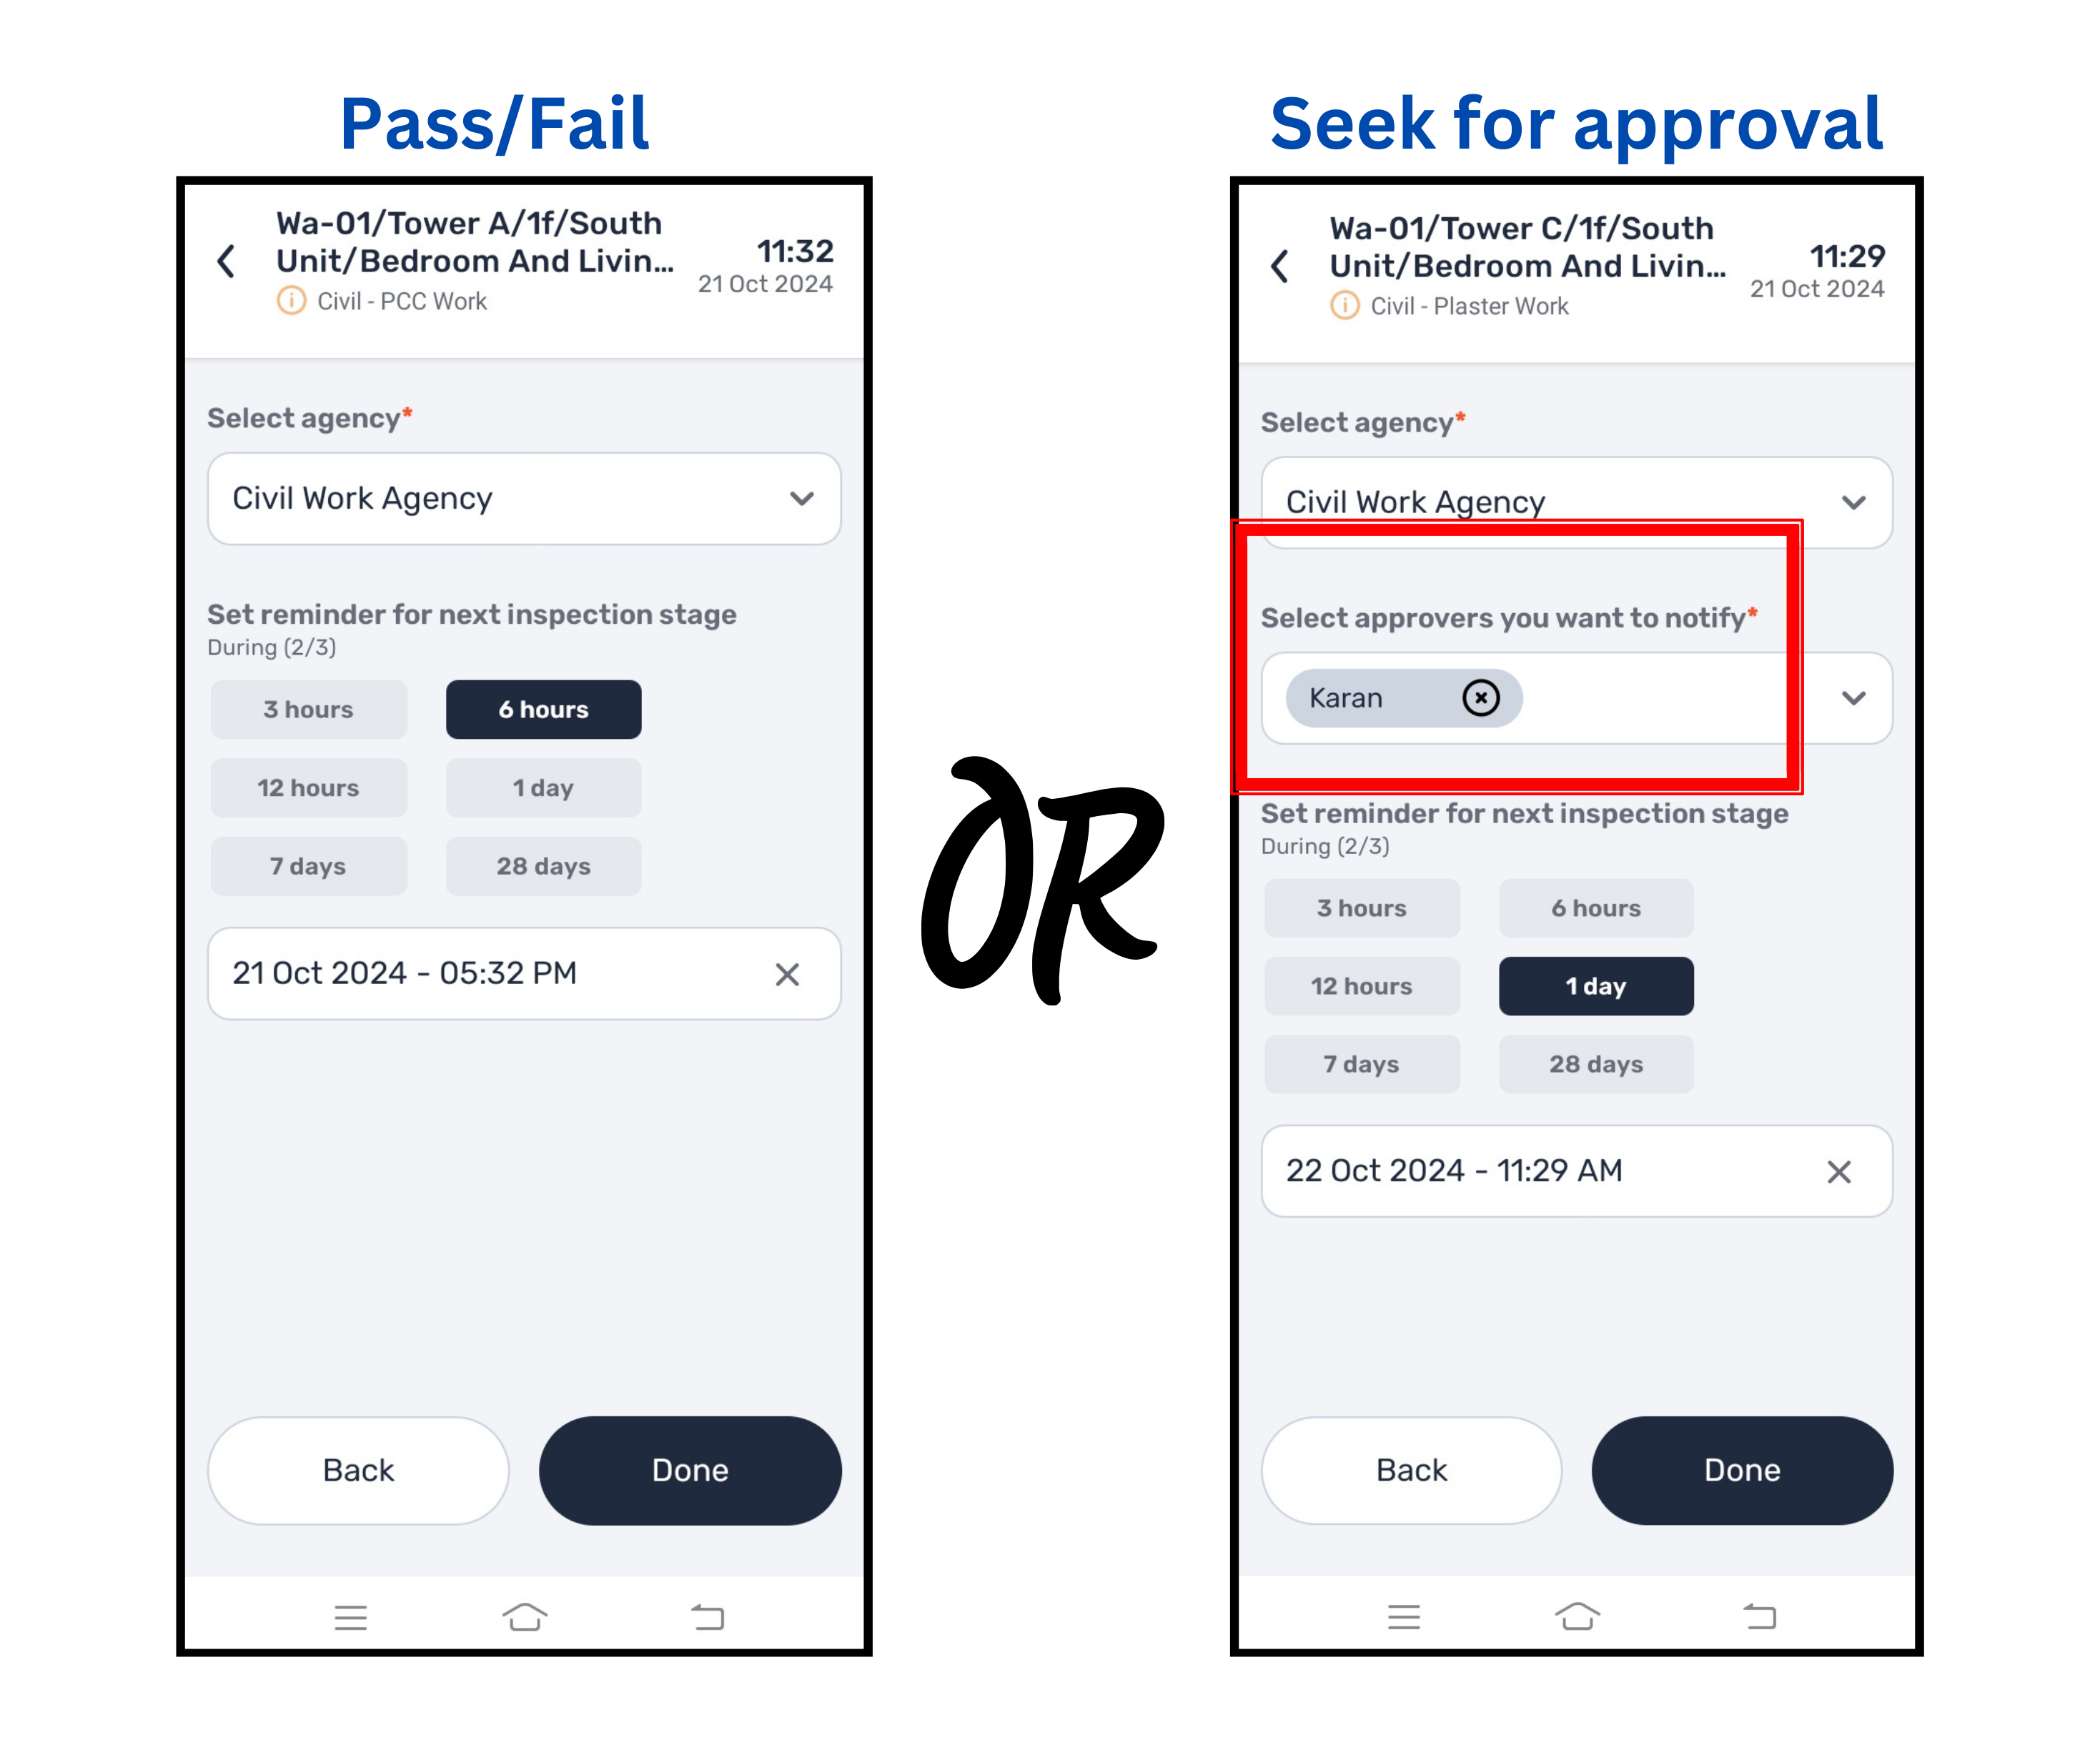
Select the Team you want to notify, and set a deadline to start the new inspection (this tab will be seen only if the next stage is there) and then click on Done.
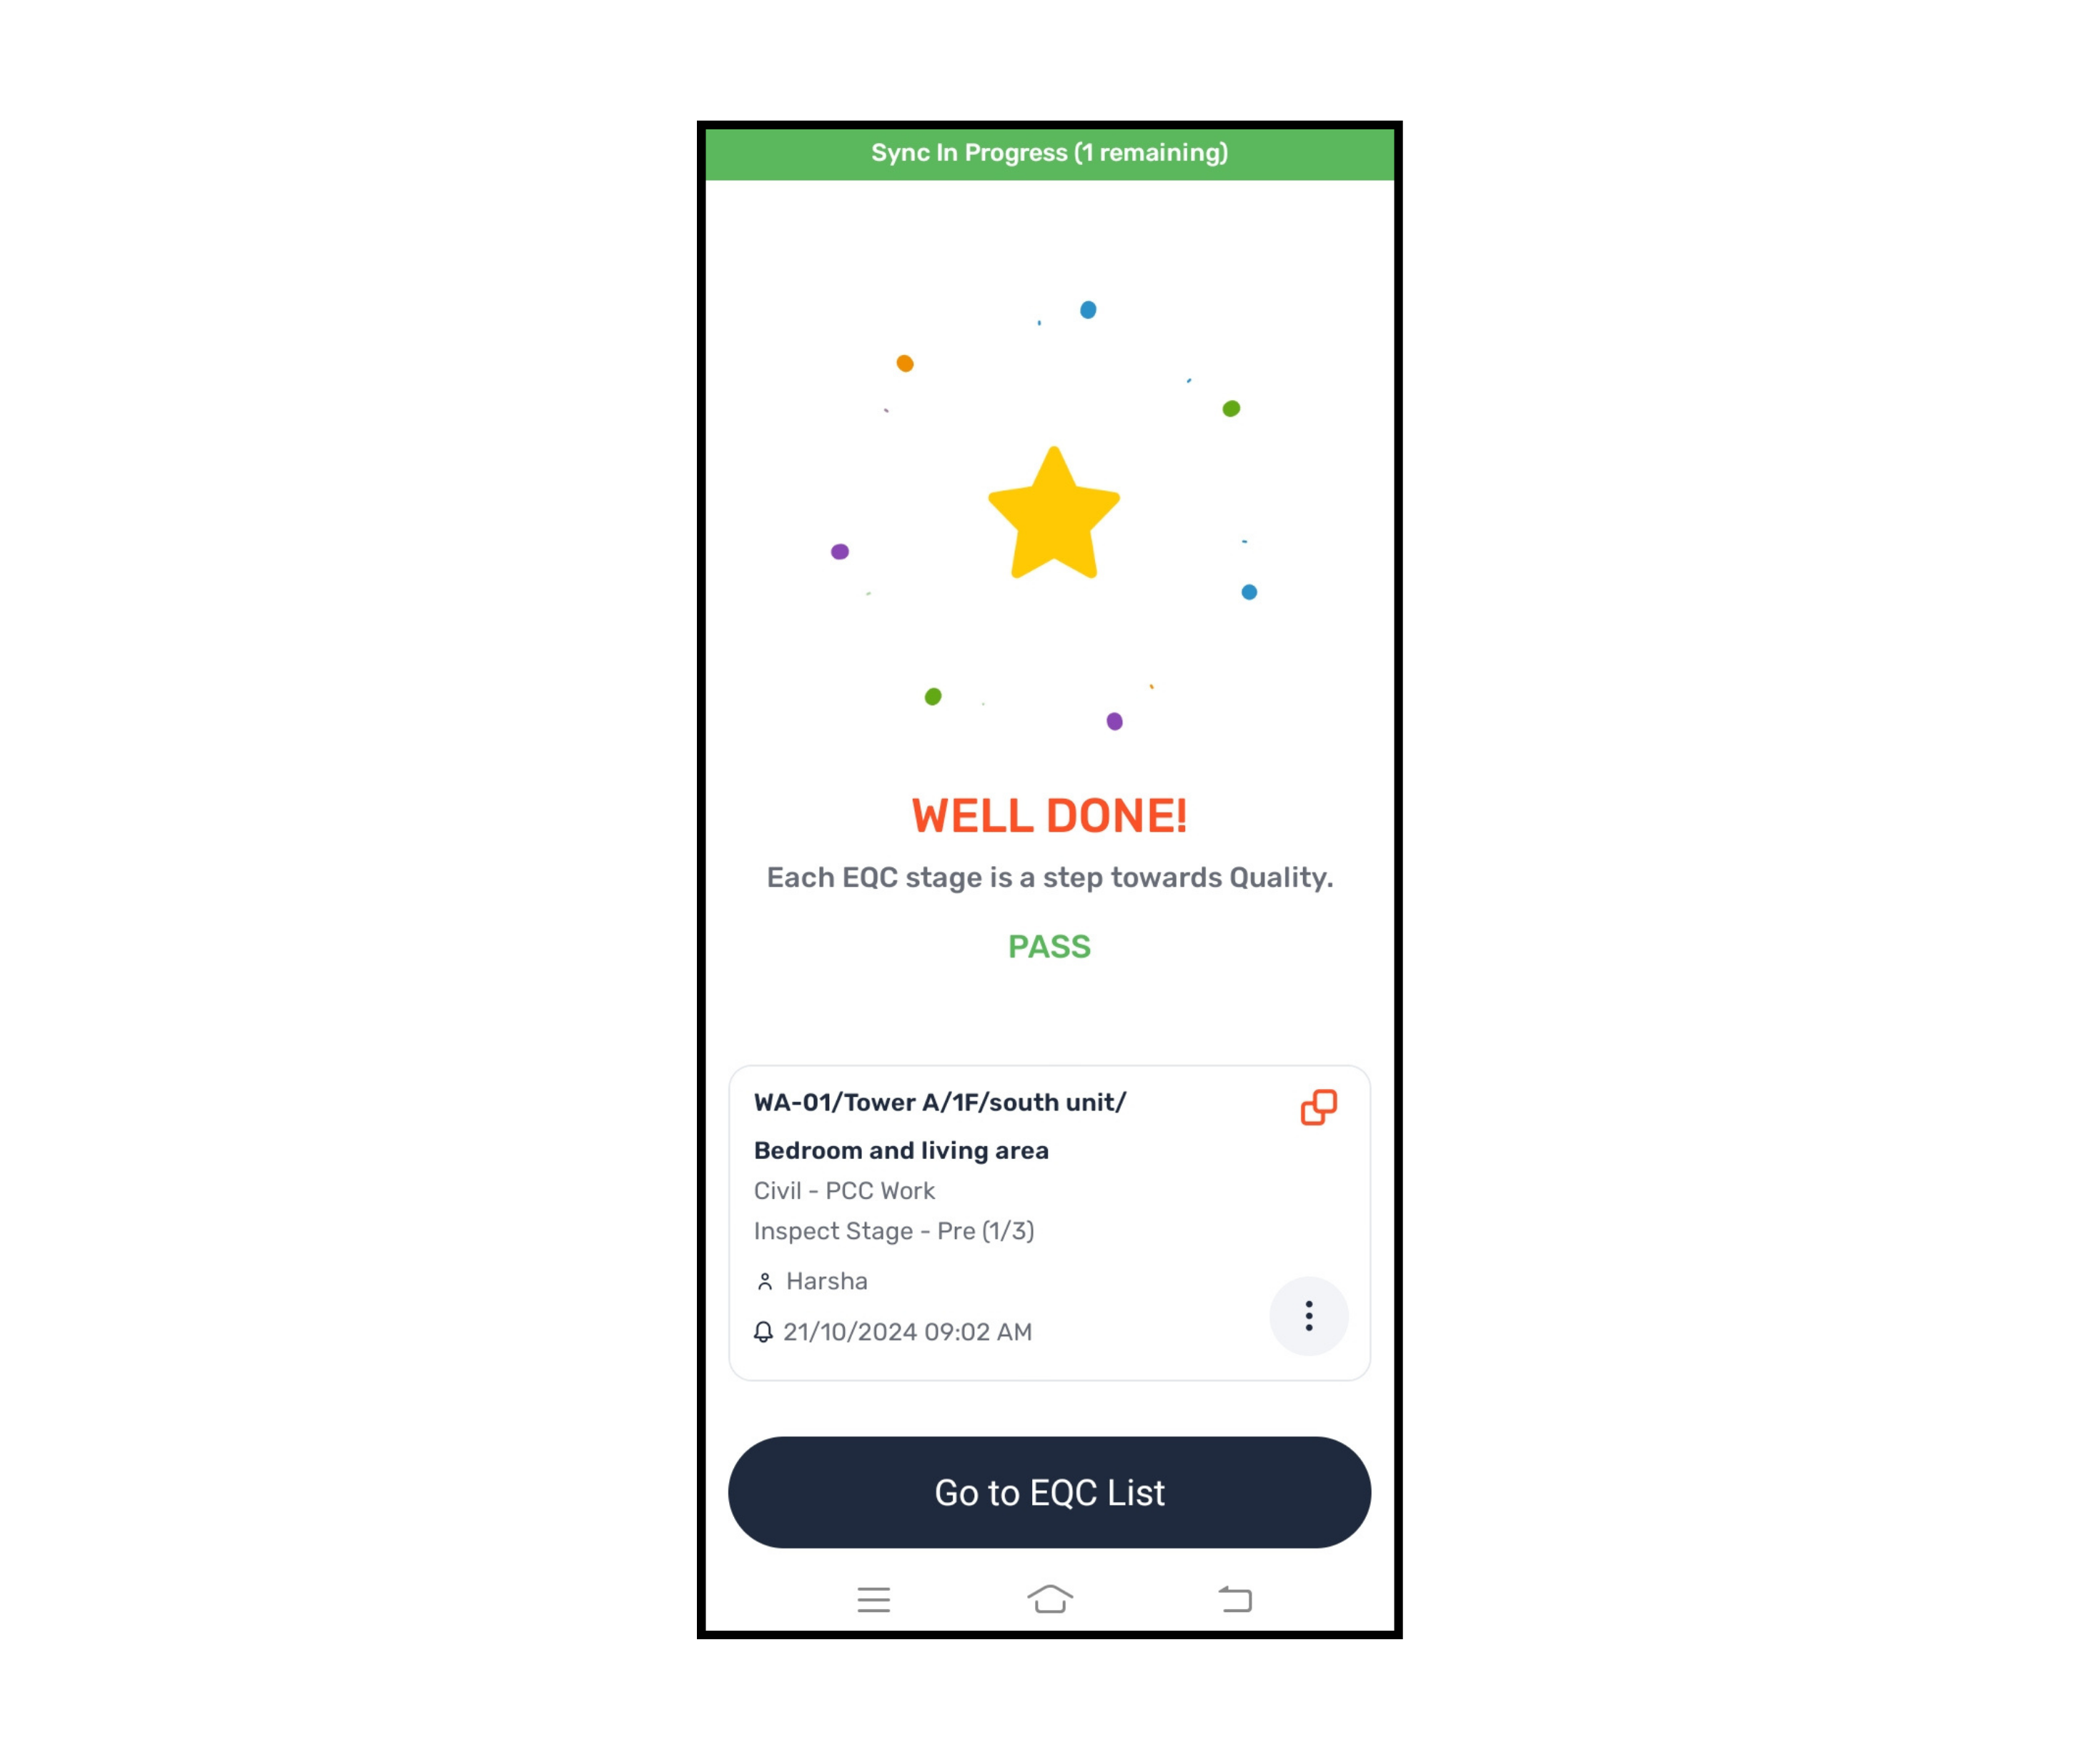
EQC starts getting sync automatically at the top.
